Quantcast
Channel: childrens songs – ESL KidStuff Blog
Viewing all 62 articles
Browse latest View live

The Morning Routines Song

$
0
0

Download a new song from ESL KidStuff: The Morning Routines Song

Morning Routines SongThe Morning Routines Song

Song Theme: Saying morning routine verbs
Target Vocab: Good morning, wake up, get up, wash my face, brush my hair, get dressed, eat breakfast, brush my teeth, put on my shoes, go to school.
Song Length: 1:19

Our original song describing our morning routines.

(Members can log in to download the full song)

There is also a video to go with the song:


Lyrics:

Chorus:

Good morning! Good Morning!
It’s time to wake up.
Good morning! Good Morning!
I have to get up.

Verse 1:

I wash my face (wash, wash, wash),
I brush my hair (brush, brush, brush),
I get dressed (dressed, dressed, dressed),
There’s such a lot to do!

Chorus:

Good morning! Good Morning!
It’s time to wake up.
Good morning! Good Morning!
I have to get up.

Verse 2:

I eat my breakfast (eat, eat, eat),
I brush my teeth (brush, brush, brush),
I put on my shoes (put on, put on),
There’s such a lot to do!

 
It’s time to go to school.


Gestures and activities to use with “The Morning Routines Song”

As you sing the song, follow these actions:

  • “Good morning! Good Morning!” – stretch your arms up (as if just waking up)
  • “It’s time to wake up” – point at imaginary wrist watch for “It’s time to” and open your hands in front of your eyes for “wake up” (to gesture opening your eyes)
  • “I have to get up” – do an energetic star jump on “get up”.
  • “I wash my face (wash, wash, wash)” – gesture washing your face
  • “I brush my hair (brush, brush, brush)” – gesture brushing your hair
  • “I get dressed (dressed, dressed, dressed)” – gesture getting dressed
  • “There’s such a lot to do!” – gesture wiping your forehead and looking tired out
  • “I eat my breakfast (eat, eat, eat)” – gesture eating breakfast
  • “I brush my teeth (brush, brush, brush)” – gesture brushing your teeth
  • “I put on my shoes (put on, put on)” – gesture putting on your shoes
  • “It’s time to go to school.” – point at imaginary wrist watch for “It’s time to” and wave goodbye for “go to school”.


Using “The Morning Routines Song” in class

The song is great fun with loads of easy gestures.  It helps make teaching morning routine verbs fun.

  1. Teach the morning routines verbs. Start with a guessing game. Before class print out the flashcards for morning routines.  Start with an easy one – “brush my teeth” – look at the card but don’t show it to anyone.  Do the action for brushing your teeth and ask “What am I doing?”.  It’s ok if the students answer in their first language – whoever answers first is the winner.  Try and elicit the English or if not, teach “brush my teeth”.  For the next card, the winner can look at the card and do the action.  Again, elicit / teach the English.  Continue until all the cards / actions have been guessed.
  2. Practice the morning routines verbs. Put the cards randomly on the board (stick on with blue-tak or tape) and draw a circle around each card.  Start by chorusing each card quickly (T: “wake up”, Ss: “Wake up”).  Go through chorusing all the cards at least three times, getting quicker and quicker as you go.  Next, point to a card and say “What’s this?”.  Get everyone to say the card together.  Point to each card and get the class to shout out the verbs together as you touch each card. Finally, remove one card from the board – the circle it was in will still be there.  Point to the empty circle and again say “What’s this?” – get everyone to shout out together the missing card.  Point to other cards and elicit them, slowly removing all the cards from the board leaving just their circles.  See if everyone can remember the words without any cards being there!
  3. Play “Flashcard touch” on the board. Put the cards back on the board, at a height that everyone can reach.  Model the game first – select a student and say “Touch put on my shoes”.  The student should go to the board and touch the correct card.  Then get the student to do the same for you.  When everyone has got the idea put them in pairs and get each pair to stand at the other end of the room.  In pairs, each student says a verb phrase as their partner runs to the board and touches the right card.
  4. Do “Morning Routines” Drawings. Give out a large sheet of paper (e.g. A3) to each student and model the activity.  Draw things you do in the morning (e.g. brush your teeth, eat toast, watch TV) – it doesn’t have to be just the activities from the flashcards / song, anything that you do is good.  Then encourage each student to draw what they do.  As they are drawing, go around the class asking questions (e.g. What’s this?  Do you really eat chocolate for breakfast, etc.?).  At the end, get everyone to stick their sheet of paper on the classroom walls. Pair up students and get them to try and guess what the pictures are.
  5. Sing “The Morning Routines” song. Put the morning routine flashcards up on the board in the order of the song, or alternatively, use our song poster. Get everyone to stand up and teach the actions and gestures for the song (see Gestures and activities to use with “The Morning Routines Song” above).  Then play the song and get everyone to sing and do the actions along with you.  Play twice so everyone gets the hang of it.
  6. Do the “My Morning 1″ worksheet. Give out the My Morning 1 worksheet to each student. Model the worksheet and then have everyone work on the sentences.  As everyone is working on their worksheets go around the class and ask questions (e.g. What does that say?  Do you take a showing in the morning?).
  7. Play charades. To finish the class, get together the morning routines flashcards and also any other action verb flashcards you have used in previous lessons.  Divide the class into 2 teams.  One student comes to the front of the class and acts out the flashcard you show to him/her.  The first person to shout out the correct answer wins a point for his/her team.
  8. Set Homework: To finish off this section of the lesson, give out the My Morning 2 worksheets for homework.

If You’re Happy & You Know It

$
0
0

Download a new song from ESL KidStuff: If You’re Happy & You Know It

If you’re happy and you know itIf You’re Happy & You Know It

Song Theme: Saying action verbs
Target Vocab: happy, clap your hands, stomp your feet, say “We are”, do all three.
Song Length: 1:22

The classic song which is great as an energy burner and good fun for all kids.

(Members can log in to download the full song)

Lyrics:

Verse 1:

If you’re happy and you know it, clap your hands.
If you’re happy and you know it
And you really want to show it.
If you’re happy and you know it, clap your hands.

Verse 2:

If you’re happy and you know it, stomp your feet.
If you’re happy and you know it
And you really want to show it.
If you’re happy and you know it, stomp your feet.

Verse 3:

If you’re happy and you know it, say “We are!”
If you’re happy and you know it
And you really want to show it
If you’re happy and you know it, say “We are!”

Verse 4:

If you’re happy and you know it, do all three.
If you’re happy and you know it
And you really want to show it
If you’re happy and you know it, do all three.


Gestures and activities to use with “If You’re Happy & You Know It”

The actions are very simple: as you sing march on the spot and do the actions from the song (clap your hands, stomp your feet, say “We are”, do all three).


Using “If You’re Happy & You Know It” in class

This song can be used with the lesson theme of emotions & feelings (for the word “happy”) or when teaching action verbs.  However, we like to use it as a fun, quick activity in the following situations:

  • At the beginning of the lesson as a fun warm up.
  • At the end of the lesson to end the class on a fun high note.
  • As an energy burner: if your kids have far too much energy and you are having a bit of trouble controlling them, running through this song a couple of times will help to burn off some of that extra energy.
  • As a wake-me-up: if your kids are getting a bit lethargic and need a boost, get everyone up, singing and marching along to this song.  It will wake them right up!
  • As a reward: kids just love this song!  Encourage everyone to do well in an activity by promising them that they can sing this song afterwards if they do a good job.
  • As a request: sometimes it’s nice to ask your students what they would like to do next.  I will often give some options (e.g. play a particular game, read a story, sing a song, etc.) including this song.

The Directions Song

$
0
0

Download a new song from ESL KidStuff: The Directions Song

The Directions SongThe Directions Song

Song Theme: Saying action verbs and directions: left, right, forward, back
Target Vocab: left, right, forward, back, jump, turn around, touch the ground, turn, sit down, stand up, clap your hands
Song Length: 1:23

A really high energy song which practices directions and action verbs.

(Members can log in to download the full song)

Lyrics:

Are you ready?

Chorus:

Jump to the left,
Jump to the right,
Jump forward,
And jump back.

Jump to the left,
Jump to the right,
Jump forward,
And jump back.

Verse 1:

Turn around and touch the ground,
Turn to the left and turn to the right.
Turn around and touch the ground,
Turn to the left and turn to the right.

Chorus

Verse 2:

Sit down and stand up,
Jump up and down and clap your hands.
Sit down and stand up,
Jump up and down and clap your hands.


Gestures and activities to use with “The Directions Song”

The actions are very simple: as you sing along do the actions of the song.


Using “The Directions Song” in class

This is a great song for burning up energy so it can be used as a warm up, energy burner or even to wake everyone up. There is some useful vocab centred around the directions left, right, forwards, back.  This is very much an action-based lesson focusing on the verbs in the song.  You’ll need two lengths of rope for this lesson.

  1. Teach left / right. Get a long length of rope and lay it on the floor from the front of the classroom to the back.  Stand at the font and to one side of the rope and get everyone to line up behind you, facing forward.  Shout “Jump to the left” and jump left over the rope.  Get everyone to follow you.  The do the same for the right: “Jump to the right”.  Do this a few times getting everyone to copy you and shout out “Jump to the left / right”.  Next, the teacher can leave the line and shout out for the rest of the class to jump left / right over the rope.  To make it into a game, sometimes shout out for the side of the rope everyone is already on – in this case everyone must jump but stay on the correct side of the rope.
  2. Teach forward / back. Now move the rope so it goes across the classroom, left to right.  Stand behind the rope with everyone in line with you.  Shout “Jump forward” and jump over the rope, with everyone copying you.  Next, shout “Jump back”.  Continue in the same way as with point 1 above.
  3. Practice left / right / forward / back. Put a second length of rope from the front to the back of the classroom, so with the two ropes it forms a large “+” in the room.  Get everyone to start front, left.  Shout out instructions (e.g.” Jump to the right”, “Jump back”, etc.) so that everyone jumps over the ropes.  Start off slowly and then get faster and faster.
  4. Left / right / forward / back pair activity. Put the students into pairs.  If you have hula-hoops use can use them but if not they aren’t necessary.  Demonstrate to the class with one student.  Tell the student to stand in the hula-hoop (or just in some space). Say to the student “Jump forward” and the student must do that.  Then Say another action (e.g. “Jump to the right”).  Continue giving instructions so the student jumps around the space in the hula-hoop (or just in the space in the room).  Now, get your pairs to do the activity, with one student shouting out instructions to his/her partner.  After a while, get the pairs to change.
  5. Practice the verbs of the song. Stand everyone in front of you.  Say the first verb and do the action (e.g. “turn around”).  Get everyone to follow you.  Continue through all of the verbs and repeat a few times so that everyone knows the actions.  You can also put the song sheet on the board so everyone can see the actions.
  6. Sing “The Directions Song”. Now that everyone has got the idea of the actions for the song they should be ready.  The song is pretty fast so make sure everyone is ready.  The teacher should also do the actions of the song and sing along so to encourage everyone to follow.  Play the song through the first time and just focus on getting the actions right.  After that play the song a couple more times and encourage everyone to sing as well.  You can play this song each week – it will become a class favorite!
  7. Set Homework: For homework, give out the Left Right Color worksheets.


Happy Halloween! song

$
0
0

Download a new song from ESL KidStuff: Happy Halloween!

Happy Halloween SongHappy Halloween!

Song Theme: Talking about Halloween and popular Halloween characters
Target Vocab: Halloween, ghost, monster, witch, black cat, wizard, mummy, bat, zombie, Look there’s a/an, Look out of the window, What will we see?, Go outside in the street, Who will we meet?.
Song Length: 2:26

A spooky song describing what you can see and meet on Halloween night.

(Members can log in to download the full song)

Lyrics:

Happy Halloween!  Happy Halloween!

Happy, Happy Halloween!  Happy, Happy Halloween!

Chorus:
Look out of the window tonight,
What will we see on Halloween night?
Go outside in the street tonight,
Who will we meet on Halloween night?

Verse 1:
Look there’s a ghost (Whooooooooo!)
Look there’s a monster (Rhhaaaaaa!)
Look there’s a witch (Cackle cackle!)
Look there’s a black cat (Meoooowwww!)

But don’t worry – they’re just kids! Wearing costumes!

Happy, Happy, Happy Halloween!

Chorus

Verse 2:
Look there’s a wizard (Ho ho hoooo!)
Look there’s a mummy (Grrrrrrrrrr!)
Look there’s a bat (Eeekk! Eeekk!)
Look there’s a zombie (Rrrrrrrrrrrrrrr!)

But don’t worry – they’re just kids! Wearing costumes!

Happy, Happy Halloween!
Happy Halloween!


Gestures and activities to use with the “Happy Halloween” song

If you can get everyone to dress up in a Halloween fancy dress costume for the class it will make the whole experience more fun! 

  • Happy, Happy Halloween!” – sing and dance along to this (dancing like zombies or monsters – like in Michael Jackson’s Thriller).
  • Look out of the window tonight” – everyone puts their hand above their eyes to ‘peer’ out of the window with a frightened expression.
  • What will we see on Halloween night?” – look around with a frightened expression.
  • Go outside in the street tonight” – walking on the spot.
  • Who will we meet on Halloween night?” - look around with a frightened expression.
  • Look there’s a ghost (Whooooooooo!)” – all do a ghost gesture and say “Whoooooooo!”.
  • Look there’s a monster (Rhhaaaaaa!)” – all walk like a scary monster and say “Rhhaaaaaa!”.
  • Look there’s a witch (Cackle cackle!)” – everyone wiggles their fingers in front of their face like a witch whilst cackling.
  • Look there’s a black cat (Mioooowwww!)” – all act like a cat whilst meowing.
  • Look there’s a wizard (Ho ho hoooo!)” – all wave imaginary wands in the air and say “Ho ho hoooo!”.
  • Look there’s a mummy (Grrrrrrrrrr!)” – walk around with arms stretched out in front and say :Grrrrrrr!”.
  • Look there’s a bat (Eeekk! Eeekk!)“- all flap around and say “Eeekkk! Eeekkk!”.
  • Look there’s a zombie (Rrrrrrrrrrrrrrr!)“- do the zombie dance/walk (as in Thriller) and say “Rrrrrrr!”.


Using the “Happy Halloween” song in class

Please check our free Halloween Lesson Plan page for ideas to use in your Halloween lessons.


I Don’t Like Cheese! (Likes & Dislikes song)

$
0
0

Download a new song from ESL KidStuff: I Don’t Like Cheese!

I Don't Like Cheese songI Don’t Like Cheese (Likes & Dislikes song)

Song Theme: Talking about your likes and dislikes
Target Vocab: I like ~, I don’t like~, cheese, chocolate, rice, French fries, strawberries, bread, ice cream, grapes, pasta, pizza, beans, food, drink, very nice, what a stink!.
Song Length: 1:27

A funny song about food likes and dislikes.

(Members can log in to download the full song)

Lyrics:

Verse 1:
I like chocolate,
I like rice,
I like French fries,
They’re very nice,
I like strawberries,
I like bread,
Oh no, what’s that?
I don’t like cheese!

Chorus:
Cheese, cheese,
I don’t like cheese,
Cheese, cheese,
Don’t give me, please!
I like lots of food,
I like lots of drink,
But as for cheese – what a stink!

Verse 2:
I like ice cream,
I like grapes,
I like pasta,
It tastes great!
I like pizza,
I like beans,
Oh no, what’s that?
I don’t like cheese!

Chorus


Gestures and activities to use with the “I Don’t Like Cheese” song

There are no gestures for this song – a listening activity with worksheet accompanies the song (see point 3 below). However, if students enjoy the song you can encourage them to sing along and dance!

Here is the worksheet: Click here to download the “I Don’t Like Cheese” song worksheet

  • students listen to the song and draw the food items they hear in the ‘I like’ and ‘I don’t like’ columns (only cheese is in the “don’t like” column). The song runs through the vocab pretty quickly, so play the song at least twice.


Using the “I Don’t Like Cheese” song in class

This is a really fun song which uses the key structures in a funny way – students have to listen to the song to complete their worksheets.

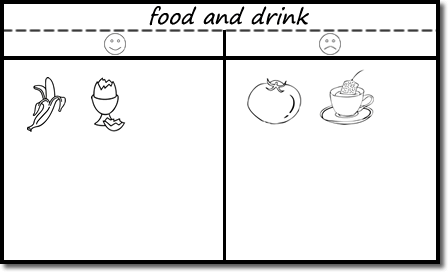
  1. Introduce “I like” and “I don’t like”. Start off by preparing your board as shown below (without the food drawings).  Also, have the following flashcards printed out (just in case): cheese, chocolate, rice, French fries, strawberries, bread, ice cream, grapes, pasta, pizza, beans.

    The board should be divided into two sections: “likes” on the left and “dislikes” on the right (indicated with a smiley and unhappy face).

    Food & Drink Board

    As a class you are going to draw food and drink items you like and don’t like, as follows:

    • First, draw a food or drink in the ‘like’ column (such as a banana).  Get everyone to shout out what you have drawn.  Gesture that you like this (say “Yummy!” and rub your tummy and smile – make it obvious that you like it a lot).  Say “I like bananas”.
    • Next, draw something in the ‘dislike’ column (such as a tomato).  Again, get everyone to shout out what you have drawn.  Gesture that you don’t like this (say “Yuk!” or “It stinks!” and grimace – make it obvious that you don’t like it).  Say “I don’t like tomatoes”.
    • To make sure everyone understands, draw another food/drink item in the like and dislike columns, using the same structures and gestures as before.  This will turn into a fun guessing game as everyone tries to guess what is being drawn.
    • Next, your students are going to draw some pictures on the board.  Invite a student up and point to the ‘like’ column and say “Draw a food or drink that you like”.  When the student draws the item, everyone has to guess what it is.  Then get the student to say “I like ~”.  The next student should draw something in the ‘dislike’ column and say “I don’t like ~”.  Keep bringing students up to the board to draw their likes and dislikes until the board is pretty full.
    • If any of the items from the song haven’t been drawn (cheese, chocolate, rice, French fries, strawberries, bread, ice cream, grapes, pasta, pizza, beans) use the flashcards to get them on the board: hold up each picture and elicit the word, then ask students to place the flashcard (use blue tak or tape) on the board in the column of their choice (whilst saying “I like ~” or “I don’t like~”).
  2. Controlled Practice saying “I like ~” and “I don’t like ~”. Put the students into pairs.  They are going to make sentences using the food and drink items on the board.  Model with a student first so everyone understands what to do: Teacher says “banana” – choosing an item from the board.  The student has to make a sentence (e.g. “I like bananas”),  The answer should be the student’s own true answer.  Then in pairs, students take turns in choosing a food item for their partner to make a sentence about.  For example:

    Student A: apples
    Student B: I like apples!

    Student B: carrots
    Student A: I don’t like carrots!

    Also, encourage the use of phrases such as “Yummy”, “Yuk” and “It stinks”. Pairs keep talking until they have gone through all of the items on the board.

  3. Play the song “I Don’t Like Cheese” and students fill in their worksheets. For this song, students listen and fill in their worksheets by drawing the different food items they hear.  The song runs through the vocab pretty quickly, so play the song at least twice.

    Click here to download the “I Don’t Like Cheese” song worksheet.

    After playing the song a few times, elicit the answers and put the flashcards on the board in the right columns so everyone can check (there will only be “cheese” in the ‘I don’t like’ column). Play the song through once more, pointing at the items on the board – encourage everyone to sing along.  Alternatively, you could use the “I Don’t Like Cheese” song poster.

  4. Magazine cut outs. Now everyone is going to make a poster showing the food and drink they like / dislike.  You will need some supermarket magazines for this – many supermarkets have free magazines showing the food they have on sale – collect as many as you can before the lesson.  Give each student a large piece of paper (construction paper or card, if possible), scissors, glue and a magazine (you can group students together to share magazines).  On the paper, each student should write their name at the top and then make a table with two columns titled “I like …” and “I don’t like”.  Then they can go through the magazines and cut out and glue food and drink pictures into the correct column on their posters.

    As the students are working on this, circulate, helping with vocab and asking questions (e.g. What’s this, Do you like ~, etc.).

    When everyone has finished, get each student to hold up their posters and explain what they like and dislike.  If you have a large class, you can do this in pairs or groups.

  5. Play the “Funny Food Likes & Dislikes Game”.  This is a really fun way to end the lesson.  You will need put the class into groups of 3 or 4 and give each group a die and the following handout (if you can enlarge it to A3 size it would be better):

    Funny Food Likes & Dislikes Game handout

    Instructions:
    Before the game starts write the following on the board:

    1. pizza
    2. soup
    3. ice cream
    4. sandwich
    5. juice
    6. cake

    1. Play the game in groups of 3 or 4.  Everyone sits around the game board.  Decide who goes first and play in a clockwise direction around the game board.
    2. Player 1 rolls a die onto the game board paper. Look at which food item it lands on and the number of the die.
    3. The player must then make a sentence with the food item and using the number on the board.  E.g. If the die lands on the cheese picture and number 3 s/he must say:

      “I don’t like cheese ice cream!”
      or
      “I like cheese ice cream” (in this case, probably not!)

    4. Cross out that picture with a pencil.
    5. The next player must roll the die.  If the die lands on a crossed out picture s/he misses a turn (also miss a turn if the die doesn’t land on a picture at all).  If the die lands on a new picture, s/he must make another like  / don’t like sentence.
    6. The game continues until all of the pictures are crossed out.

    At the end of the game you can ask everyone to tell you the strangest thing they made a sentence about (e.g. “I don’t like hamburger ice cream!”).

  6. Set Homework: For homework, give out the “Food likes & dislikes 1” or “Food likes & dislikes 2” worksheet (depending on the level of your students).


Let’s Get Dressed song

$
0
0

Download a new song from ESL KidStuff: Let’s Get Dressed

Let's Get Dressed songLet’s Get Dressed (Clothes song)

Song Theme: Talking about different clothes
Target Vocab: Let’s get dressed, Put on your ~, quick, get ready, shirt, pants/trousers, socks, jacket, shoes, hat.
Song Length: 1:29

A song about getting dressed with a brilliant dressing up game to play.

(Members can log in to download the full song)

Lyrics:

It’s time to go to school
Let’s get dressed!

Put on your shirt, put on your shirt,
Quick, get ready, put on your shirt.

Put on your *pants, put on your *pants,
Quick, get ready, put on your *pants.

Put on your socks, put on your socks,
Quick, get ready, put on your socks.

Put on your jacket, put on your jacket
Quick, get ready, put on your jacket.

Put on your shoes, put on your shoes,
Quick, get ready, put on your shoes.

Put on your hat, put on your hat,
Quick, get ready, put on your hat.

It’s time to go to school,
Quick, get ready, let’s get dressed!

(* In the British English version of the song the word “pants” is replaced with “trousers”).


Gestures and activities to use with the “Let’s Get Dressed” song

During the song your students will play a wonderful dressing up game – a lot of fun!  Before class you need to collect as many old (adult size) clothes as you can for the following vocab: shirt, pants/trousers, socks, jacket, shoes, hat.  If you can’t get enough, ask parents to bring in some old clothes for the lesson.  The clothes need to be adult size as the students are going to put them over their own clothes – having such big clothes actually makes the activity more fun!

Depending on how many clothes you can find, you can either have everyone dress up at the same time or you can have a few students come up to the front of the class to do the activity.

Pile the clothes in a big heap and start the song.  As the first clothing item is mentioned (shirt) the students have to scramble in the pile of clothes to find a shirt and put it on before the next item of clothing is mentioned. As the song is played the students put on all the clothes until they are fully dressed.  Then finish the game by getting the students to race in taking off their adult-sized clothes – the first to remove them all is the winner!


Using the “Let’s Get Dressed” song in class

This is an active song which can be used to play a really fun dressing up game. NOTE: You will need to prepare some old clothes to use in the lesson (see point 1 below):

  1. Prepare as many old (adult-sized) clothes as possible. Before class you need to collect as many old (adult size) clothes as you can. Have at least the following: shirt, pants/trousers, socks, jacket, shoes, hat – however, other clothes will be useful as well, such as skirt, dress, coat, jeans, shorts, blouse, sweater, neck tie, t-shirt, vest.  If you can’t get enough, ask parents to bring in some old clothes for the lesson.  The clothes need to be adult size as the students are going to put them over their own clothes – having such big clothes actually makes the activity more fun!
  2. Introduce the vocab. No doubt the large pile of clothes in the classroom will have attracted a great amount of attention, so you’ll have little difficulty in introducing the topic!  Settle the class down and get everyone to sit down.  Ask for a volunteer and have them stand at the front of the class with you.  Tell the class the volunteer is going to get dressed up – with as many different types of clothes as possible!  Pull out the first clothing item (e.g. a t-shirt).  Elicit / teach and chorus the word for the item.  Then help your volunteer to put it on.  Only put on each item of clothing when you are satisfied that everyone has chorused the word correctly.  Then move onto the next clothing item.  As you select each item think about the order – you’ll want your volunteer to be putting the jacket, shoes and hat on last.  Keep adding clothes until your volunteer is really well dressed up.
  3. Practice the clothing vocab with flashcards. Help the volunteer undress and then get everyone to look at the board.  Make sure you have the same clothing flashcards as the old clothes you are using. Stick the first flashcard on the board and elicit the vocab and write the word clearly below it.  Do the same for all of the other flashcards.  Next tell everyone to close their eyes and remove one of the flashcards from the board.  Now shout “Open your eyes” – everyone must shout out the missing flashcard.  Play this until all the flashcards have been elicited.
  4. Play “Team Racing”. Divide the class into 2 teams.  Line up the 2 teams at one end of the classroom with the old clothes on the floor at the other end.  You will shout out an instruction (e.g. “Put on some socks!”) and one member from each team will race against the other to the pile of clothes, put on the clothing item and run back to their team.  The person who gets back first wins a point for his/her team.  At the end, the team with the most points is the winner.
  5. Sing “Let’s Get Dressed”. Prepare everyone for the song first.  Make sure the following clothes are on the floor: shirt, pants/trousers, socks, jacket, shoes, hat.  If you have enough for everyone to get dressed at the same time you can do the song with everyone participating with the actions.  If not, have a few students do the song actions while everyone else sings along (the words are simple) – you can give everyone a go by playing the song a few times.

    The song is also an active listening exercise.  Students will have to listen for the clothing item and then put it on.  Pile the clothes in a big heap and start the song.  As the first clothing item is mentioned (shirt) the students have to scramble in the pile of clothes to find a shirt and put it on before the next item of clothing is mentioned. As the song is played the students put on all the clothes until they are fully dressed.  Then finish the game by getting the students to race in taking off their adult-sized clothes – the first to remove them is the winner!

  6. Do cut and paste craft sheets.  We have two different cut and paste craft sheets for clothes: “Dress Up Craft“(for lower levels) and “Clothes Craft” (for higher levels).  For younger students, cut out the clothes before class so they only need to color and glue the clothes onto the bodies.  You can do this craft as an active listening exercise but giving instructions on which clothes to cut out and what colors they should be:

    E.g. “First cut out the socks, color them blue and glue them on the boy”

    So that everyone has to listen and cut out/color the correct items.

  7. Create a “Clothes Catalogue Scene“. For this you will need to bring in some old catalogues or magazines.  Put the class into small groups and give each group a large piece of construction paper / card, scissors, glue and some felt tip pens. Tell the class that they have 10 minutes to create a scene with lots of people: the students will have to cut out clothes and draw to create the picture.  It will help if you have already created your own scene so students can see what they have to do.  As everyone is creating their scenes, walk around the classroom asking lots of questions related to the vocab (What is he wearing?, etc.) and helping with any new vocab.

    Finally, have each group present the scene using the structure “He / She is wearing” (e.g. “She is wearing a blue hat”).  You can put all the scenes on the classroom walls as decoration and to review in future lessons.

  8. Set Homework: For homework, give out the “Colorful Clothes” or “Jungle Clothes” worksheets (depending on the level of your students).


New Song: The Thanksgiving Song!

$
0
0

Download a new song from ESL KidStuff: The Thanksgiving Song!

Thanksgiving SongThe Thanksgiving Song!

Song Theme: Singing about the Thanksgiving turkey
Target Vocab: Thanksgiving, turkey, hello, how are you? gobble, wobble, hip hip hooray!
Song Length: 1:38

A Thanksgiving themed song with lots of fun turkey actions!

(Members can log in to download the full song)

Lyrics:

Verse 1:
Hello Mr. Turkey, Hello Mr. Turkey
How are you? How are you?
Hello Mr. Turkey, Hello Mr. Turkey
How are you? How are you?

With a “Gobble, gobble, gobble, gobble,
gobble, gobble, gobble, gobble, gobble”

And a “Wobble, wobble, wobble, wobble,
wobble, wobble, wobble, wobble, wobble”

Happy, Happy Thanksgiving
Hip hip hooray! Hip hip hooray!

Verse 2:
Hello Mr. Turkey, Hello Mr. Turkey
How are you? How are you?
Hello Mr. Turkey, Hello Mr. Turkey
How are you? How are you?

With a “Gobble, gobble, gobble, gobble,
gobble, gobble, gobble, gobble, gobble”

And a “Wobble, wobble, wobble, wobble,
wobble, wobble, wobble, wobble, wobble”

With a “Gobble, gobble, gobble, gobble, gobble”
And a “Wobble, wobble, wobble, wobble, wobble”

“Gobble, gobble, gobble, gobble, gobble”
“Wobble, wobble, wobble, wobble, wobble”

Happy, Happy, Happy Thanksgiving
Hooray!


Gestures and activities to use with “The Thanksgiving Song”

The actions for this song are simple, fun and energetic – who wouldn’t enjoy running around like a turkey?!

Everyone stands up for the song:

  • “Hello Mr. Turkey, Hello Mr. Turkey” – everyone sings and waves.
  • How are you? How are you?” – do the question gesture (palms up with inquisitive face).
  • With a gobble … And a wobble…” – this is the really fun bit. Everyone runs around like a turkey (crouched over, flapping elbows in a wobbly fashion) while gobbling!
  • Happy, Happy Thanksgiving” – stop running around and sing.
  • Hip hip hooray!” – throw arms up in the air in celebration!


Using ”The Thanksgiving Song” in class

Please check our free Thanksgiving Lesson Plan page for ideas to use in your Thanksgiving lessons.


Christmas Songs for ESL Kids – downloads

$
0
0

Download 2 new songs from ESL KidStuff: “We Wish You a Merry Christmas” & “Jingle Bells”

We have added two songs for download to use in your ESL kids Christmas lessons.  Both songs have been adapted so that they are much easier for kids learning English (see our discussion in an earlier article on adapting Christmas Carols).

We Wish You A Merry Christmas SongWe Wish You a Merry Christmas (adapted)

Song Theme: Talking about Christmas and Christmas traditions
Target Vocab: Merry Christmas, Happy New Year, Santa, Rudolf, sleigh, presents, Christmas tree, decorations, roast turkey, Christmas pudding.
Song Length: 2:22

A classic Christmas song with easier lyrics for kids learning English.

(Members can log in to download the full song)

Lyrics:

Chorus:
We wish you a Merry Christmas,
And a Happy New Year.

Verse 1:
Santa and Rudolf,
Will fly in their sleigh,
We’ll open our presents,
And have a great day!

Chorus

Verse 2:
Our Christmas tree’s up,
With decorations,
We’ll eat a roast turkey,
And Christmas pudding.

Chorus

Verse 3:
Santa and Rudolf,
Will fly in their sleigh,
We’ll open our presents,
And have a great day!

Chorus

Verse 4:
Our Christmas tree’s up,
With decorations,
We’ll eat a roast turkey,
And Christmas pudding.


Using the “We Wish You a Merry Christmas” song in class

Please check our free Christmas Lesson Plan page for ideas to use in your Christmas lessons.


Jingle Bells SongJingle Bells (adapted)

Song Theme: Talking about Christmas and Christmas traditions
Target Vocab: Jingle Bells, riding, snow, Santa, Rudolf, sleigh, laughing, bells, nose, shining, roof, chimney, fast asleep, Christmas tree, Merry Christmas, shout.
Song Length: 1:22

A classic Christmas song with easier lyrics for kids learning English.

(Members can log in to download the full song)

Lyrics:

Verse 1:
Riding through the snow, Rudolph pulls the sleigh,
Santa sits inside, laughing all the way,
Bells are ringing clear, nose is shining bright,
Rudolf and Santa are coming to your home tonight!

Chorus:
Jingle bells, jingle bells, jingle all the way!
O what fun it is to ride with Santa in his sleigh.
Oh! Jingle bells, jingle bells, jingle all the way!
O what fun it is to ride with Santa in his sleigh.

Verse 2:
Landing on our roofs, going down chimneys,
Leaving Christmas presents, under Christmas trees,
We’re all fast asleep, as Santa rides about,
In the morning we’ll wake up and “Merry Christmas” shout!

Chorus:
Jingle bells, jingle bells, jingle all the way!
O what fun it is to ride with Santa in his sleigh.
Oh! Jingle bells, jingle bells, jingle all the way!
O what fun it is to ride with Santa in his sleigh.


Using the “Jingle Bells” song in class

Please check our free Christmas Lesson Plan page for ideas to use in your Christmas lessons.


New Song: The Easter Song!

$
0
0

Download a new song from ESL KidStuff: The Easter Song!

Easter SongThe Easter Song!

Song Theme: Singing about the Easter rabbit and looking for Easter eggs
Target Vocab: Easter rabbit, hiding, chocolate eggs, Look in the ~, garden, living room, kitchen, bedroom, dining room, bathroom, everywhere, I’ve found my chocolate eggs, yummy!
Song Length: 1:13

A really fun Easter song with about searching for Easter eggs!

(Members can log in to download the full song)

Lyrics:

Chorus:
Easter rabbit, Easter rabbit,
Comes when I’m in bed,
Easter rabbit, Easter rabbit,
Hiding chocolate eggs.

Verse 1:
Look in the garden (garden)
Look in the living room (living room)
Look in the kitchen (kitchen)
Look everywhere!

Where are the chocolate eggs?

Chorus
 
Verse 2:
Look in the bedroom (bedroom)
Look in the dining room (dining room)
Look in the bathroom (bathroom)
Look everywhere!
 
Where are the chocolate eggs?
 
Chorus
 
Verse 3:
I’ve found my chocolate eggs!
Yummy! Yummy! Yummy! Yummy!
Chocolate eggs!


Gestures and activities to use with “The Easter Song”

The actions for this song are very simple, fun and energetic – lots of hopping around like a rabbit!

Everyone stands up for the song:

  • For the chorus, everyone hops around the classroom like a rabbit
  • For the verses, pretend to be looking for Easter eggs (gesture with palm of hand over eyes)


Using “The Easter Song” in class

Please check our free Easter Lesson Plan page for ideas to use in your Easter lessons.


What Time Is It? song

$
0
0

Download a new song from ESL KidStuff: What Time Is It?

What Time Is It?What Time Is It?

Song Theme: Saying and asking for the time
Target Vocab: What time is it?, Please could you tell me the time?, It’s _ o’clock
Song Length: 1:09

A simple song which helps to practice the structures for telling the time.

(Members can log in to download the full song)

Lyrics:

Tick-tock-tick-tock
Tick-tock-tick-tock

Chorus:

What time is it?
What time is it?
Please could you tell me the time?

Verse 1:

It’s one o’clock
It’s two o’clock
It’s three o’clock
It’s four o’clock
It’s five o’clock
It’s six o’clock

Tick-tock-tick-tock
Tick-tock-tick-tock

Chorus

Verse 2:

It’s seven o’clock
It’s eight o’clock
It’s nine o’clock
It’s ten o’clock
It’s eleven o’clock
It’s twelve o’clock

Tick-tock-tick-tock
Tick-tock-tick-tock


Gestures and activities to use with the “What Time Is It?” song

For this song your students are going to be human clocks, using their arms to show the time.  Have everybody stand up with plenty of room to move their arms around without hitting anyone.

  1. For the question words sing along and hold your hands out, palms up, in the question gesture.
  2. For the times, hold your arms straight out in the time position.  So, for 1 o’clock, hold one arm straight up towards 12 and the other arm towards one.  As the song continues, one arm will move around the clock counting off each hour.


Using the “What Time Is It?” song in class

This is a really good song for introducing your students to telling the time as it contains key vocab and structures.  The gestures are easy and fun – your students will enjoy swinging their arms around with the times in the song.

  1. Introduce a clock and review numbers 1 to 12. Start the lesson by bringing in a clock or alternatively make a craft clock using our clock shape craft sheet. Elicit and chorus the word “clock”.  Then point to number 1 and elicit the number.  Point to each number 1-12 in order and elicit the numbers (you can move the hour hand around as you do this).
  2. Practice recognizing numbers 1-12. Before class prepare twelve A4 sheets of paper with a number (1-12) written on each piece.  Place the numbers randomly around the walls of the classroom at a height where your student can reach them.  In class, draw your students’ attention to the numbers and say “Point to number 1″.  Everyone should point.  Then go through all the numbers 1-12.
  3. Play “Touch the numbers on the wall”. Get everyone standing in the middle of the classroom.  Shout “Touch Number 7!”.  Everyone should run and touch that number – it will be a mad scramble but good fun!  Then go through the rest of the numbers.
  4. Write the numbers on the board. Along the top of the board write the numbers in order 1-12. Divide the class into 4 teams and get each team to elect a representative to write on the board.  Have the 4 students come to the board and tell them they are going to race to write the numbers 1-12.  The winner will win a point for their team.  Say “Ready – Steady – Go!” and the 4 students race to write the numbers.  Then get another 4 students to have a go.  At the end the team with the most points is the winner.
  5. Teach the time vocab. Hold up your clock and set a time (e.g. 4 o’clock).  Ask the class “What time is it?”.  Elicit / teach “It’s 4 o’clock”.  Move the hand to another time, and ask again (you can also ask “Please could you tell me the time?”).  Go through the hours eliciting the times from the class until they have got the hang of the structures.
  6. Practice the gestures of the song. Stand everyone in front of you. Say “Point you hands at 1 o’clock” and demonstrate how to do this (hold one arm straight up at 12 and the other at 1).  Then say “Point you hands at 2 o’clock” … continue all the way round to 12 o’clock.
  7. Sing the “What Time Is It?” song. Now that everyone has got the idea of the actions for the song they should be ready. The teacher should also do the actions of the song and sing along so to encourage everyone to follow. Play the song through the first time and just focus on getting the actions right. After that play the song a couple more times and encourage everyone to sing as well.
  8. Do the Clock Craft Sheet.  Before class print out the clock shape craft sheet – enough so that each student has one. You can either cut out the shapes before class or have your students cut out the shapes in class. You will also need fasteners for each clock to fasten the arms to the clock.  After constructing the clocks, put students in pairs.  First model the activity with a student.  Student A sets a time on his/her clock and asks “What time is it?” or “Please could you tell me the time?”.  Their partner answers.  Each pair takes it in turn to ask each other.
  9. Play “What time do you?”. Still using the clocks, your students are going to show you the time they usually do things.  Ask the class questions, such as “What time do you usually wake up?” (if they are not sure you can use gestures to show what you mean). As you ask the questions, everyone should move the hands on their clock to the time they do these activities.  Then select some students to orally tell you their time (e.g. “I wake up at 7 o’clock”). We are only concentrating on “o’clock” for this lesson, so if students have times on their clock such as 7.20 you can teach “About 7 o’clock”.

    Other routine questions you can ask the time for could be: eat breakfast / lunch / dinner, go to bed, go to school, leave school, take a bath, do homework, brush teeth, etc.

  10. Set Homework: For homework, give out the “What time is it? It’s __ o’clock” worksheet.


The Wheels on the Bus

$
0
0

Download a new song from ESL KidStuff: The Wheels on the Bus

Wheels on the BusThe Wheels of the Bus

Song Theme: Talking about travelling on the bus
Target Vocab: bus, wheels, go round, town, wipers, go swish, horn, goes beep, doors, open, shut, babies, go boo-hoo, driver, sit down.
Song Length: 1:58

A fun song with great vocab.

(Members can log in to download the full song)

Lyrics:

Verse 1:
The wheels on the bus
Go round and round
Round and round
Round and round.
The wheels on the bus
Go round and round
All around the town.

Verse 2:
The wipers on the bus
Go swish, swish, swish
Swish, swish, swish
Swish, swish, swish.
The wipers on the bus
Go swish, swish, swish
All around the town.

Verse 3:
The horn on the bus
Goes beep, beep, beep
Beep, beep, beep
Beep, beep, beep.
The horn on the bus
Goes beep, beep, beep
All around the town.

Verse 4:
The doors on the bus
Go open and shut
Open and shut
Open and shut.
The doors on the bus
Go open and shut
All around the town.

Verse 5:
The babies on the bus
Go “Boo-hoo-hoo!
Boo-hoo-hoo!
Boo-hoo-hoo!”
The babies on the bus
Go “Boo-hoo-hoo!”
All around the town.

Verse 6:
The driver of the bus
Says “Please sit down!
Please sit down!
Please sit down!”
The driver of the bus
Says “Please sit down!
All around the town.

Verse 7:
The wheels on the bus
Go round and round
Round and round
Round and round.
The wheels on the bus
Go round and round
All around the town.


Gestures and activities to use with “The Wheels on the Bus” song

The actions of the song are really easy and mimic what is happening in the song.

  • For verse 1, whirl your arms around in the air for “The wheels on the bus go round and round …” part.
  • For verse 2, swish your arms lefts and right for “The wipers on the bus go swish, swish, swish …” part.
  • For verse 3, beep an imaginary horn for “The horn on the bus goes beep, beep, beep …” part.
  • For verse 4, swish your arms back and forth for “The doors on the bus go open and shut …” part.
  • For verse 5, put your fists to your eyes and mimic crying for “The babies on the bus go boo-hoo-hoo …” part.
  • For verse 6, look angry and wave your finger for  “The driver on the bus says “Please sit down” …” part.
  • Verse 7 is the same as verse 1


Using ”The Wheels on the Bus” song in class

This is a really popular song which kids just love to sing along to.  The song introduces some great vocab and makes for a good ‘present simple’ lesson.

  1. Introduce the vocab with a drawing exercise. For this lesson you are going to use your artistic drawing skills.
    • Start by drawing a large picture of a bus on the board – make it as large as you can, filling the whole board.  Elicit / teach / chorus the word “bus”.
    • Next, shade in the wheels and again elicit / teach / chorus the word “wheels”.  Now teach the action word “go round and round” and get everybody making round and round movements with their arms as you say “The wheels on the bus go round and round”.
    • Now draw wipers onto the picture and teach “wipers” and “swish” and get everyone to do the swishing action with their arms.
    • Then draw a steering wheel (through the window) and motion driving and honking the horn.  Teach and practice “horn” and “beep”.
    • Draw the doors on the bus and teach “doors”, “open and shut” and practice do opening and shutting actions with your arms.
    • Now for the tough bit – drawing babies on the bus!  Draw the windows and draw babies looking out.  You can show flashcard pictures if your drawing is not up to scratch! Teach and practice “babies”, “boo-hoo”.
    • Finally, draw the driver sitting on the bus holding the steering wheel.  Teach / practice “driver”, “Please sit down”.  When teaching “Please sit down” get everyone standing up and have fun telling everyone to sit down and stand up, so they all get the meaning.
  2. Play “I say, you do”. Now to practice the vocab.  Get everyone to stand up facing the teacher.  Start by saying a random sentence from the song (e.g. “The doors on the bus go open and shut”) and get everyone to do the action.  At first go slowly, saying different sentences and having everyone do the action from the gestures section above.  Then go faster and faster until it is impossible to keep up.
  3. Sing “The Wheels on the Bus”. First play the song and get everyone to follow you with the actions.  Then play the song again and encourage everyone to sing along.
  4. Draw the bus pair work activity. Put everyone in pairs and give them a large piece of plain paper (A3 size is good).  Each pair will have to cooperate to draw the same picture as yours on the board.  Give the first instruction “Everybody draw a bus” and encourage each pair to work together to draw the outline of the bus.  Then give the next instruction “Now draw the wipers”.  As they are doing so ask random students what wipers do (“swish- swish-swish”).  Keep going until all the pictures are complete and colored in.  Finally, pin all the pictures to the walls and have each pairs stand in front of their pictures.  Play the song one more time, and have the students touch the parts of the picture as it is mentioned in the song (e.g. they touch the wipers on the line “The wipers on the bus go swish, swish, swish”)
  5. Do a “Take the Bus” role-play. This is the show stopper which your students will love.  Arrange all the chairs so that they are facing forwards in rows, just like on a bus.  The teacher can be the driver (if you can find a driver’s cap to wear, all the better!).  Get everyone to line up outside the bus (at the bus stop) and ‘drive’ the bus to the bus stop.  Everyone can enter the bus, pay for their ticket (prepare tickets before class and ever use toy money) and then sit down.  Then start driving the bus and as you go, shout out “lean left!” and “lean right” as you go around corners and get everyone to lean with you.  Do lots of other fun things, such as:
    • beep the horn (everyone does together)
    • stand up and sit down to help go up and down hills (Don’t forget to say “Please sit down”)
    • stop!!!  (everyone lurches forward)
    • speed up!!! (everyone is pushed back in their seats
    • jump up and down (when the bus gets stuck in mud)

    At the end, pull up to the stop and shout “Everybody, get off the bus!”  You can even invite other students to take on the role of bus driver.

  6. Set Homework: For homework, give out the “Bus Draw” worksheet.


Numbers 1-20 Song

$
0
0

Download a new song from ESL KidStuff: Numbers 1-20 Song

Numbers 1-20 SongNumbers 1-20 Song

Song Theme: Counting up to 20
Target Vocab: Numbers 1-20
Song Length: 1:09

A quick counting song.

(Members can log in to download the full song)

Lyrics:

Verse 1:
1 – 2 – 3 – 4 – 5
6 – 7 – 8 – 9 – 10
1 – 2 – 3 – 4 – 5 – 6 – 7 – 8 – 9 – 10

Verse 2:
11 – 12 – 13 – 14 – 15
16 – 17 – 18 – 19 – 20
11 – 12 – 13 – 14 – 15 – 16 – 17 – 18 – 19 – 20

Verse 3:
1 – 2 – 3 – 4 – 5 – 6 – 7 – 8 – 9 – 10
11 – 12 – 13 – 14 – 15 – 16 – 17 – 18 – 19 – 20

Ok … Let’s do all the numbers!

1 – 2 – 3 – 4 – 5 – 6 – 7 – 8 – 9 – 10
11 – 12 – 13 – 14 – 15 – 16 – 17 – 18 – 19 – 20


Gestures and activities to use with “Numbers 1-20 Song” song

There are a few activities you can do with this song.

  • Before playing the song write the numbers 1-20 on the board.  Keep them large and in order.  Everyone sings along as the teacher points to each number.
  • Have the numbers 1-20 printed on A4 sheets of paper and stuck around the walls of the classroom.  As the song is sung, everybody has to point to the correct number (the numbers can be put on the walls in the correct order or for a more difficult activity, in random order!).
  • Giving everybody a copy of the Numbers 1-20 song poster.  As the song is being played the students must sing along and touch each number as it is sung.


Using “Numbers 1-20 Song” in class

This should not be taught before the Numbers 1-10 lesson.  Once your students can count to 10 this lesson will help them to reach 20!

  1. Review numbers 1-10. First write the numbers 1-10 on the board and have everyone shout out the numbers as you write them.  Next, get 10 soft balls, cubes or something similar (before class, tape numbers 1-10 onto the balls) and chorus the numbers on each ball.  Then throw the balls around the room and ask individual students to bring you different numbers (e.g. “Maria, please give me number 6″). Finally, play and sing along to “The Numbers Song (Numbers 1-10)“.
  2. Play “Pass the Parcel Numbers 11-20″.  You are going to play a version of “Pass the Parcel” to introduce the numbers 11-20.  Before class get 10 sheets of A4 paper and write a number (11-20) on each sheet.  Shuffle the papers up so they are ordered randomly.  Now make your parcel – roll one sheet of paper onto a ball (with the number on the inside) and then wrap the next sheet (number inside) around the ball.  Keep wrapping the sheets around the ball until all are used up and you have a parcel.  If you like, you can include a small sweet with each sheet of wrapped paper.

    In class, get everybody to sit in a circle.

    • Play some music and have everybody pass the parcel around the circle until you stop the music.  The person holding the parcel when you stop the music can unwrap the first layer.  Ask for that sheet of paper and stick it on the board with the number showing.  At this point there is no need to teach the number.
    • Start the music again and then stop it after the parcel has been passed around a while.  The student holding the parcel can unwrap the next sheet and look at the number.  S/He should then stick it on the board either to the left or right of the number already there, depending on if it comes before or after that number (e.g. if the first number was 15 and the second one is 19, then it should be placed after the 15).
    • Keep playing “Pass the Parcel” until all the numbers are stuck on the board in the correct order 11-20
  3. Teach numbers 11-20. Now that you have all the numbers on the board, you can chorus them with your class.  Start with 11 and chorus it 3 times with the class.  Continue with all the numbers.  Now chorus each number in turn (11, 12, 13, etc.) and run through 11-20 a few times, each time getting faster and faster.  Now, put your class into pairs.  Have each pair practice saying the numbers together (e.g. A: 11, b: 12, A: 13, B: 14, etc.).
  4. Play “Stand in the right order”. Next give each student a number sheet from the board.  If you have more than 10 students make more numbers so you have two groups.  For less than 10 students, give out more sheets per student but make sure the numbers they have are in sequence (e.g. give a student numbers 14 and 15, not 14 and 18).  Now tell your students to stand in a line in the right order.  Everyone has to shuffle around until they are standing and holding their numbers in order 11-20.  Now, get the class to shout out their numbers from 11-20, down the line.  Make it a game – each round try and do it faster than the last!
  5. Do the “Write the numbers 1-20 on the board” activity.  You are going to get everyone to help write the numbers on the board which you can use when singing the “Numbers 1-20 Song”.  Draw 20 large squares on the board 4 rows.  Call out a student and ask him/her to write a large number 1 in the first box.  Keep calling out students to fill in the rest of the squares so you have all of the numbers 1-20 on the board.
  6. Sing the “Numbers 1-20 Song”.  Play the song and have everybody call out the numbers along with the song.  It will help a lot if you point to each number on the board as it is sung.  It is a really fast paced song so keeping up might be a challenge but this makes it fun.  Play the song a few times until everyone can sing along well.  Also worth doing is giving everybody a copy of the Numbers 1-20 song poster.  As the song is being played the students must sing along and touch each number as it is sung.
  7. Do the “1-20 Balls Write 1” worksheet.  Give out the worksheet and circulate and help as the students write the numbers.
  8. Set Homework: For homework, give out the “1-20 Balls Write 2” worksheet.


New Song: Where are you Going?

$
0
0

Download a new song from ESL KidStuff: Where are you Going?

Where are you Going? songWhere are you Going?

Song Theme: Asking and answering about where you are going.
Target Vocab: Where are you going (right now)?, I’m going to ~, school, the park, the shops, the beach, my friend’s house, the station, the zoo, home.
Song Length: 0:54

A song about going to different places in your neighborhood using the present continuous tense.

(Members can log in to download the full song)

Lyrics:

Chorus:
Where are you going?
Where are you going right now?

Verse 1:
I’m going to school,
I’m going to the park,
I’m going to the shops,
I’m going to the beach.

Chorus:
Where are you going?
Where are you going right now?

Verse 2:
I’m going to my friend’s house,
I’m going to the station,
I’m going to the zoo,
I’m going home.


Gestures and activities to use with the “Where are you Going?” song

The gestures are very simple and fun:

  • during the chorus everyone does the ‘question gesture’ (both palms up, looking quizzical) whilst swaying in time with the music.
  • during the verses everyone either walks around the classroom or walks on the spot – in time with the music.


Using the “Where are you Going?” song in class

This is a nice easy song which introduces students to different places in their town.  NOTE: You should do the “How did you get here today?” song and lesson before this lesson as the transportation vocab taught for that song will be used in this lesson during the “Where are you Going? Board Game”.

  1. Play the “Snake Follow” game. This lesson starts in a really fun way.  Get everyone to line up behind the teacher.  Get everyone to shout “Where are you going?” and on that prompt shout back “Over here!” and start walking to a different part of the classroom, with everyone following in a line behind you (like a snake).  Keep doing as you snake your way around the classroom at different speeds.  Other students can also have a go at being the head of the snake.
  2. Introduce the vocab. Before class prepare the flashcards for the different places in the song:

    school, the park, the shops, my friend’s house, the station, the zoo
    home
    the beach

    Hold up each flashcard and elicit / teach the word.  Have students pass each flashcard around the class with each student saying the word as s/he passes the card.

  3. Play “Flashcard Slam” and “Missing Flashcard”. First play “Flashcard Slam” – lay all the flashcards on the floor and get everyone to sit around the cards in a circle (for large groups, have a few sets of flashcards so you can do this in groups).  Teacher says “Touch the station!” ad everyone must quickly slam their hand down on the correct card.  Play this until every card has been practised.  Then play “Missing Flashcard” – with the cards all laid out on the floor, tell everyone to close their eyes.  Then the teacher takes away one card.  Say “Open your eyes” and everyone must shout out the missing card.  Continue to play with other missing cards until all vocab has been practised.
  4. Play “I’m going to… “. You’ll need to sets of the places flashcards for this game, which practises the key structures “Where are you going?” and “I’m going to …”.  Get everyone to close their eyes as you place each card from one set around the room (e.g. place the zoo card in the corner, the park card under a desk, etc.).  Tell everyone to open their eyes.  Give a card (e.g. zoo) from the second set to a student.  Have the following conversation (model):

    Teacher: “Where are you going?”
    Student: “I’m going to the zoo”
    Teacher: “Ok then.  Goodbye”
    Student: “Goodbye”

    The student must then search for the zoo flashcard. When s/he finds it s/he can return to you for another card.  As the first student is searching, give another card (e.g. the beach) to another student and have the same conversation.  Eventually, you will have students searching all over the place and returning for another card – it’ll be a bit hectic but great fun – plus the key structures are being practised.

  5. Sing the “Where are you Going?” song. Put the places flashcards on the board in the order of the song (or put up the song poster).  Get everyone to stand up and show them the gestures (see above).  Then run through the song a few times.
  6. Play the “Where are you Going” board game. This is a great board game to play in groups of 2-4 players.  Put the class onto groups and give out the boards and game cards (you’ll need to print and cut out before the lesson).  Each group needs a die and each player a small count (pen tops, etc., will do.).  Then explain the rules and model how to play the game (the rules are on the worksheet).  Then let everyone play.  As they are playing, walk around and help out and make sure the structures are being used.
  7. Set Homework: For homework, give out the “Where are you Going Write” worksheet.


The Family Song

$
0
0

Download a new song from ESL KidStuff: The Family Song

The Family SongThe Family Song

Song Theme: Saying different members of the family.
Target Vocab: father, mother, brother, sister, grandfather, grandmother, family, hello, how are you?, I’m fine thank you, See you soon.
Song Length: 2:30

A really nice song for very young learners with family finger puppet play.

(Members can log in to download the full song)

Lyrics:

Verse 1:
Hello father, Hello father,
How are you? How are you?
I’m fine thank you, I’m fine thank you,
See you soon, See you soon.

Verse 2:
Hello mother, Hello mother,
How are you? How are you?
I’m fine thank you, I’m fine thank you,
See you soon, See you soon.

Verse 3:
Hello brother, Hello brother,
How are you? How are you?
I’m fine thank you, I’m fine thank you,
See you soon, See you soon.

Verse 4:
Hello sister, Hello sister,
How are you? How are you?
I’m fine thank you, I’m fine thank you,
See you soon, See you soon.

Verse 5:
Hello grandfather, Hello grandfather,
How are you? How are you?
I’m fine thank you, I’m fine thank you,
See you soon, See you soon.

Verse 6:
Hello grandmother, Hello grandmother,
How are you? How are you?
I’m fine thank you, I’m fine thank you,
See you soon, See you soon.

Verse 7:
Hello family, Hello family,
How are you? How are you?
I’m fine thank you, I’m fine thank you,
See you soon, See you soon.


Gestures and activities to use with “The Family Song”

For this song students use finger puppets (download and cut out the puppets):

  • before the song, help everyone to put on the puppets – there are 6 puppets altogether, 3 on each hand.
  • as the song plays, students wiggle the puppet for that particular verse (e.g. in Verse 1 it is “father”) and sing along.
  • for the last verse (family) students wiggle all of their finger puppets


Using “The Family Song” in class

This is an easy song which introduces students to the words for different family members. This is a great song and lesson to teach little ones as they completely understand the concept of family.

NOTE: if possible, ask the parents before class to arrange for their kids to bring in family photos – parents, grandparents, brothers, sisters, themselves.  Also, bring in a few family photos of your own.

  1. Do “Teacher’s Family Photos Time” activity. If you can bring in photos of your family, this is a great activity to do.  Also try to encourage your students to bring in photos of their family – you’ll need to arrange this with the parents before the lesson.  If you can’t bring in photos, see the alternative below.

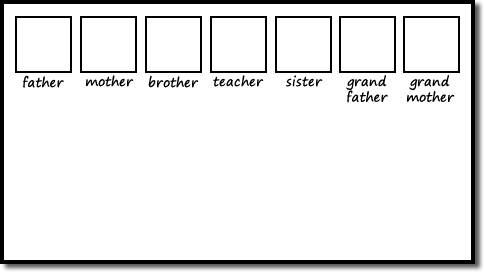
    Draw 7 squares on the top of your board in a row (see image below). Hold up a photo of yourself and ask “Who is this?”.  Elicit that it is you, stick the photo inside the middle square and write your name under the photo.  Next take out another photo (e.g. your father) and again ask “Who is this?”.  Elicit and teach the family vocab and stick the photo in one of the squares and write the word (e.g. “father”) under the photo.  Do for all of the following: father, mother, brother, sister, grandfather, grandmother – you may not have some of these family members, but for the sake of this lesson, use photos of friends, etc., and pretend they are your brother, grandmother, etc.

    Board layout for family photos 1

    Your students will really enjoy seeing your family photos and will probably ask questions – feel free to extend the information you give on your family members, especially if it reviews previous lessons, such as ages and jobs.  Also, you can practice/review describing vocab (e.g. blond hair, big eyes, etc.).

    Alternative: If you can’t bring in family photos: instead of using your family photos, cut out pictures of people from magazines and pretend they are your family members. Younger kids will generally believe you (and may even be quite impressed!).

  2. Do “Students’ Family Photos Time” activity. If your students have brought in photos of themselves and their families, this is a great activity to do. If not, go to step 3.

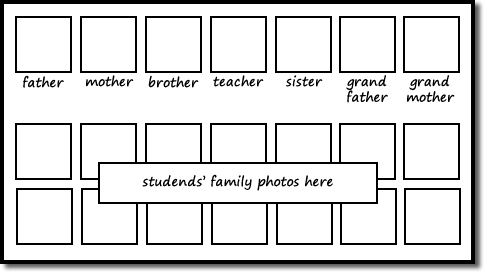
    On the board, under the row of 7 photos of your family you are going to place photos from each of the students’ families. First, hold up the photos of the students in your class and elicit who they are – each time, stick their photo in the middle column and write their names underneath.

    Next, you are going to play a guessing game – hold up a photo of one of your student’s family members (e.g. Hugo’s sister) and get everyone to guess whose family the person belongs to.  Elicit family vocab (e.g. “It’s Hugo’s sister“) and place the photo on the board in the correct place (e.g., for Hugo’s sister, it would go in the row of Hugo’s photo and in the sister column).

    Board layout for family photos 2

    Keep holding up randomly selected photos of your students’ family members and placing on the board until your board is full of family photos. 

  3. Make “My Family Tree” Posters. Give out a piece of colored construction paper / card to each student.  They are each going to make a family tree poster of their family.  Begin by demonstrating the activity – with a green and brown crayon draw a large tree, filling up the whole piece of paper.  At the top write in large letters “My family”.  Then, either stick your photos family photos onto the tree or draw pictures of your family (grandparents at the top, next your parents and you and your siblings at the bottom).  Finally, under each family member photo/picture write the vocab (grandfather, mother, etc.).

    Now get your students to do the same.  If they brought in photos they can use them on their poster – if not, encourage them to draw pictures of their family members.  Students can copy the words from your poster (display it clearly).

    Finally, have each student pin their poster to the walls of the classroom.  Ask each student questions (e.g. Is that you mother?  What is your brother’s name?  How old is your sister?).

    NOTE: Depending on the level of your students you can have them write more information about their family members on the poster (e.g. names, ages, jobs, etc.). Students can even draw pictures of their pets.

  4. Make and play with Finger Puppets. For the song we are going to use finger puppets (craft sheet here).  Before class, print and cut out the finger puppets. We have color and black & white versions of the craft sheet – if using the black & white version, have your students color in the puppets before starting the song. Then attach the puppets to each students’ fingers by taping the straps around the finger – 3 puppets on each hand.

    Next, check everyone understands which puppet is which – say “Everybody wiggle grandfather” – make sure you are wearing your finger puppets as well so you can demonstrate.  Go through each puppet, wiggling fingers.  Then play a quick game: say “Wiggle the sister” and everyone has to quickly wiggle the right one.  Do for a few rounds until everyone has got the hang of it.

  5. Sing “The Family Song”. Play the song and sing along – wiggling the correct puppet for each verse (e.g. verse 1 is “father”).  If everyone enjoyed the song, play it once more.
  6. Play “Finger Puppet Conversations”. By now, everyone should have the idea of the structures from the song, so we are going to have some fun role-plays with the finger puppets.  First model with one student.  Hold up one finger puppet (e.g. mother) and get the other student to hold up one finger (e.g. grandfather).  Role-play a fun conversation, for example:

    T: Hello grandfather.
    S: Hello mother.
    T: How are you?
    S: I’m fine, thank you.  How are you?
    T: I’m fine, thank you. See you soon.
    S: See you soon.

    Then you can change finger puppets and do the conversation again.  Depending on level, you can also throw in a few more questions, such as, “What’s your name?”, “How old are you?”, “Where do you live?”, etc.

    Now the class can role-play.  Put everyone into pairs and set a timer to one minute.  Shout “Start!” and the pairs should role-play with different puppets until the timer goes off.  Then shout “Change partners!” and everyone finds a new partner for another one-minute conversation.  Keep going for a few rounds.

  7. Set Homework: For homework, give out the “My Family” worksheet.


What Sports do you Play?

$
0
0

Download a new song from ESL KidStuff: What Sports do you Play?

What Sports do you Play? songWhat Sports do you Play?

Song Theme: Talking about playing different sports.
Target Vocab: sports, play, soccer/football, tennis, golf, basketball, baseball, volleyball, rugby, badminton.
Song Length: 1:16

A lively song about playing sports.

(Members can log in to download the full song)

Lyrics:

Chorus:
What sports do you play?

Verse 1:
I play *soccer (soccer!),
I play tennis (tennis!),
I play golf (golf!),
I play basketball (basketball!).

Chorus:
What sports do you play?

Verse 2:
I play baseball (baseball!),
I play volleyball (volleyball!),
I play rugby (rugby!),
I play badminton (badminton!).

* In the British version of the song the word “football” is sung instead of “soccer”.


Gestures and activities to use with the “What Sports do you Play?” song

The gestures revolve around the actions for the different sports in the song:

- During the chorus have everyone sing and clap along.

- For the verses have everyone do the actions as they sing:

  • soccer/football: kick an imaginary ball
  • tennis: hit an imaginary tennis ball with an imaginary racket
  • golf: swing an imaginary gold club
  • basketball: bounce an imaginary basketball
  • baseball: swing an imaginary baseball bat
  • volleyball: smash an imaginary ball with your hand
  • rugby: throw an imaginary rugby ball to the side
  • badminton: smash an imaginary shuttlecock with an imaginary racket


Using the “What Sports do you Play?” song in class

This is a lively song which introduces the phrases “What sports do you play” and “I play ~”.  During the lesson you’ll have a lot of fun playing different sports.

  1. Introduce and play sports. As the lesson is sports themed we are going to do lots of fun sports activities.  Make sure all of the desks and chairs are moved to the side of the classroom.

    - You’ll need the following sports flashcards: soccer/football, tennis, golf, basketball, baseball, volleyball, rugby, badminton
    - You’ll also need lots of review flashcards from previous lessons
    - You’ll need the following equipment: balloons, bean bag balls or small soft balls, a waste paper basket or a cardboard box, a length of rope

    Start by dividing the class up into teams (for small classes 2 teams, larger classes up to 4 teams).  Get each team to come up with a team name and then elicit the team names and write across the top of the board (this will become the score board).  During this part of the lesson students will compete in a number of sports and win points for their team.

    Soccer/Football: First, stick the soccer/football flashcard onto the bottom of the board and say “What sport is this?”.  Elicit “Soccer” or “Football”.  Then say, “I like playing soccer (or football)”.  Do you like playing soccer (or football)?”.  Hopefully this will elicit some positive responses.  Then stand up and say “Ok, let’s play soccer (or football)!”.

    Get everybody to stand up and form a line, each student behind the other, one line per team.  At the other end of the classroom make a small goal (use two chairs or cushions for goal posts).  Place a balloon a few meters in front of the goal – far enough so that when kicked makes it possible to score but not too easy.  Hold up a review flashcard – the first student in the first team has to say the vocab correctly to have a shot.  If correct, let them run up and kick the balloon.  A goal earns a point (write on the score board).  Play until at least each student has had a chance to shoot.  Then get everyone to sit down and review the team scores (we are not finished yet!).

    Tennis: Next, place the tennis flashcard on the board and elicit it.  This time we are going to play “Head Tennis” with balloons.  Pair up 2 students from opposing teams and have them stand facing each other.  They then have to head the ball between each other – the last player to head the balloon wins (for younger students, patting the balloon is fine).  The winner has to then answer a question to win a point for their team (e.g. What’s your name? How old are you?, etc.).  Play until everyone has had a go, then sit everyone down and review the team scores.

    Golf: Same as above with eliciting the flashcard.   This time we are going to play “Pencil Golf”.  Put students in pairs from opposing teams and have them face up in the middle of the classroom with a pencil each. Give each pair a small bean bag ball or soft ball.  Players take turns to hit the ball towards the opposite wall – therefore each student will compete to hit the ball in a different direction – however, as they are only using pencils the balls won’t travel far each hit!  Give a time limit of 2 minutes.  After 2 minutes, the student from each pair who is closest to his/her wall is the winner.  Now, the winner will have say the correct vocab word for a review flashcard to win a point for their team.  Then sit everyone down and review the team scores.

    Basketball: Same as above with eliciting the flashcard. This time we are going to play “Shoot the Basket”.  You’ll need a waste paper basket or just a cardboard box. Also, take a piece of paper and screw it up into a ball. Get everybody to stand up and form a line, each student behind the other, one line per team.  Put the basket at the other end of the classroom.  Hold up a review flashcard – the first student in the first team has to say the vocab correctly to have a shot at the basket with the screwed up paper ball.  If correct, let him/her take a shot.  A successful shot earns a point (write on the score board).  Play until at least each student has had a chance to shoot.  Then get everyone to sit down and review the team scores.

    Baseball: Same as above with eliciting the flashcard. This time we are going to play “Balloon Baseball”.  Have each team line up – everyone is a batter and the teacher is the pitcher.  Stand in front of the first student in the line and ask a question (e.g. Where do you live?,  What is your favorite food?, etc.).  If the student answers correctly pat the balloon towards the student.  S/he has to hold their hands together and swing and hit the balloon (like a baseball swing).  A successful hit wins a point.  Any hit that bounces against a classroom wall wins an extra point for a home run! Play until at least each student has had a chance to bat.  Then get everyone to sit down and review the team scores.

    Volleyball: Same as above with eliciting the flashcard. This time we are going to play “Balloon Volleyball”.  Put students in pairs from opposing teams and have them face up with a length of rope separating them (you can lie the rope right across the classroom and have students stand either side as they play). Give each pair a balloon.  They pat the balloon to each other and try to stop it hitting the floor – whoever let’s it drop loses a point.  Let everyone play for a few minutes, then ask who the winner of each game is.  To win a point for their team they must answer a review flashcard correctly.  Then get everyone to sit down and review the team scores.

    Rugby: Same as above with eliciting the flashcard. This time we are going to play “Rugby Balloon Pass”. In rugby you have to pass the ball backwards, so we are going to play a game passing a balloon backwards.  Get each team to line up, each student behind the other.  Give the player at the front of each team’s line a balloon.  S/he must pass the balloon backwards to his team-mate over the head.  The next player passes behind to his/her team-mate between the legs, and so on, over the head and between the legs.  Each team must race against each other.  The team that gets the balloon to the last player wins a point. You can play this game a few times. Then get everyone to sit down and review the team scores.

    Badminton: Same as above with eliciting the flashcard. This time we are going to play “Badminton Keep Ups”. Put students in pairs from opposing teams.  Give each student a screwed up paper ball.  Each student has to compete against his/her partner to pat the ball up the most times before the ball hits the ground.  Allow everyone about 2 minutes and then find out who managed to keep the ball up the most from each pair. To win a point for their team they must answer a review flashcard correctly.  Finally, get everyone to sit down and tally the final scores to find out which team is the winner.  The winning team will get a special prize at the end (see point 6 below)!

  2. Teach structures “What sports do you play?”, “I play ~”, “I don’t play~”. You should now have 8 sports flashcards on the board.  Model the structures: point at the first card and say “I play soccer/football” – while nodding you head.  Then go to the next flashcard and say “I don’t play tennis” shaking your head.  Go through all the cards saying what you do and don’t play.

    Now model with some students.  Ask one student “What sports do you play?” and help him/her go through the 8 sports saying what s/he does and doesn’t play.  Do this with a couple more students so everyone gets the idea.  Now in pairs, students ask and answer the question.  Change pairs a few times until everyone has had plenty of practice.

  3. Sing “What Sports do you Play?”. Get everyone to stand up and sing along to the song whilst they do the gestures (see the ‘Gestures and activities to use with the “What Sports do you Play?” song’ above).  Either use the flashcards on the board to prompt the order of the sports in the song or use our song poster.  Sing the song through a couple of times.
  4. Teach sports verbs and equipment vocab. On the board write: “To play soccer (or football) you have to __________ a soccer ball (or football).  Elicit the missing verb and write “kick” in the blank.  Before class, cut out the words from this “Sports Vocab Cut Outs” worksheet – enough for each group of students.  In pairs, the students have to match the words (e.g. golf – hit – golf ball).  As students are matching the words go around the class checking and asking questions.
  5. Do the “Let’s Play Sports!” worksheet. This worksheet practices the vocab from the last point.  Give each student a worksheet and circulate as everyone fills in the blanks.
  6. Special prize for the winning team. The winning team from the sports competition at the beginning of the lesson can end the class by choosing one of the 8 sports for everyone to play again (no review flashcards necessary this time!).
  7. Set Homework: For homework, give out the “Sports Match up” or “Can you play …?” worksheet.


Mr. Farmer’s Vegetables

$
0
0

Download a new song from ESL KidStuff: Mr. Farmer’s Vegetables

Mr. Farmer's Vegetables SongMr. Farmer’s Vegetables

Song Theme: Talking about different vegetables.
Target Vocab: farmer, farm, growing, carrots, potatoes, cabbages, onions, pumpkins, corn, radish, lettuce.
Song Length: 1:36

An upbeat song about a farmer growing vegetables on his farm.

(Members can log in to download the full song)

Lyrics:

Chorus:
Oh, Mr. farmer, what are you growing?
On your farm, on your farm.
Oh,  Mr. farmer, tell us what you’re growing,
On your farm, on your farm.

Verse 1:
I am growing carrots, carrots,
I am growing potatoes, potatoes,
I am growing cabbages, cabbages,
I am growing onions, onions.

Chorus:
Oh, Mr. farmer, what are you growing?
On your farm, on your farm.
Oh,  Mr. farmer, tell us what you’re growing,
On your farm, on your farm.

Verse 2:
I am growing pumpkins, pumpkins,
I am growing corn, corn,
I am growing radish, radish,
I am growing lettuce, lettuce.


Gestures and activities to use with the “Mr. Farmer’s Vegetables” song

Before playing the song, put flashcards of the vegetables all around the walls of the classroom (in the same order of the song). Then start the song and do the following gestures:

- During the chorus have everyone do the cowboy dance – thumbs in belt hoops and kicking your legs out in time with the music.

- For the verses point to each of the vegetable flashcards on the wall.


Using the “Mr. Farmer’s Vegetables” song in class

This is a fun, cowboy-style song which introduces some common vegetables. Students will make a vegetable basket craft and practice saying their likes and dislikes.

  1. Play “Find the Vegetables”. If possible, before class buy one of each of the following vegetables (and other kinds if you like): a carrot, a potato, a cabbage, an onion, a pumpkin, corn (on the cob if possible), a radish, a lettuce.  If you can’t bring vegetables into class, other options are: plastic fruit (sometimes available at dollar shops and toy shops), vegetable flashcards, vegetable photos cut out of free supermarket magazines.  Also, bring in a basket for the vegetables.

    Before your students enter your classroom hide the vegetables all around the room – in draws, behind books, under things, etc.  Once you are ready to begin the main part of your lesson, have everyone sit down and say to your students “Let’s look for some vegetables!”.  Then stand up and demonstrate that you are searching for something.  Find one of the vegetables and show your thrill in doing so.  Take it over to the basket and drop it in saying “Put it in the basket”.  Then get everyone to hunt around the room until all of the vegetables have been found and placed in the basket.

  2. Teach vegetable vocabulary. Hold up the first vegetable and chorus the word three times (e.g. “carrot, carrot, carrot”).  Then pass the vegetable around the class, each student saying the name as they pass it.  Do this for all of the vegetables.
  3. Play “The Missing Vegetable” and “Blindfold Touch”.  Line all the vegetables up on a desk.  Say “Close your eyes” and get everyone to cover and close their eyes.  Take away one of the vegetables and hide it behind your back – everyone must open their eyes and shout out the missing vegetable. Play this until all of the vegetable vocabulary has been practised.

    Keep the vegetables lined up on the desk.  Take out a blindfold and model the activity – put on the blindfold then touch and feel one of the vegetables.  Look confused and say the wrong word (e.g. touch a cabbage and say “Is it a carrot?”).  Get the students to help you until you guess correctly.  Then blindfold one student, turn him/her around 3 times and help him/her to go to the desk and touch/feel one vegetable and say what it is.  Give all of the students a go.

  4. Play “Musical Pass the Vegetables”. Sit everyone in a circle, put on some music, and have everyone pass all of the vegetables around the circle (in the same direction).  So the music will be playing and all of your vegetables will be going around the circle.  Suddenly stop the music – the students holding the vegetables must shout out the name of the vegetable they are holding.  The last person to shout out the correct word is out (and also remove their vegetable).  Keep playing, with each round the last person going out.  This should end with just 2 students passing one vegetable back and forth. It’s a really fun game!
  5. Sing “Mr. Farmer’s Vegetables”. Prepare for the song by taking out the flashcards of the vegetables.  Show each one in the order of the song (so carrot first, potato next, etc.) and stick each one on the walls of the classroom.  Try and get it so that the cards are evenly distributed around the walls (still in the order of the song) so you will have to turn 360 degrees to look at all of the cards.  Alternatively, you can use the song poster.  Get everyone to stand up and dance, sing and point to the vegetables (as described in “Gestures and activities to use with the “Mr. Farmer’s Vegetables” song” above). You can play the song 2 or three times.
  6. Do the “Vegetable Basket Craft. Use the following craft sheets:

    Before class, print off enough craft sheets for each student as well as yourself and cut out the basket and vegetable pictures. Give the cut-outs to each student and then get everyone to follow you as you color in the vegetables and the basket – as you are doing this chat with your students, asking questions such as “What color shall we use for the potato?”, “Do you like cabbage?”, “What’s your favourite vegetable?”, etc.  When everything has been colored in, glue the baskets to construction paper and get students to put in their vegetables (have students say the names of the vegetables as they do so).

    An alternative is to print off just one large basket and get everyone to put their colored vegetables into the “class basket”.

  7. Play “Let’s make Vegetable Soup”. To finish off the lesson we are going make some imaginary vegetable soup.  You need a large cooking pot, ladle and some plastic/paper bowls and spoons.

    Say “I’m hungry.  Let’s make some soup!” (while rubbing your empty stomach).  Take out the large pot and say “Let’s cook vegetable soup!  We need some vegetables”. Model by taking one of your vegetable cut-outs from your craft basket – say “Yummy, I like (radish)” and put it into the pot and stir.  Then say, “Hmm. We need some more vegetables”.  Invite each student to take some of their vegetables from their craft basket and put into the pot, saying “Yummy, I like ~”.  Keep stirring – you can also invite students to give the soup a stir.

    Finally, say “The soup is ready!”.  Get everyone to hold out their bowls and ladle in some imaginary soup.  If some students refuse, this is fine – try and get them to say “I don’t like vegetable soup”.  Then say “Let’s eat!”.  Make lots of slurping noises and say things like “Yummy!” and “Delicious!” and encourage everyone else to do the same.  You can even offer seconds!  Finish off by getting everyone to retrieve their vegetable cut-outs from the pot and put back into their baskets.

  8. Set Homework: For homework, give out the “Vegetable Basket” worksheet.


Let’s Look at the Animals (Adjectives Song)

$
0
0

Download a new song from ESL KidStuff: Let’s Look at the Animals (Adjectives Song)

Let's Look at the Animals songLet’s Look at the Animals (Adjectives Song)

Song Theme: Using adjectives to describe animals.
Target Vocab: big, small, long, fat, fast, strong, bear, mouse, snake, hippo, horse, lion, What’s that?
Song Length: 1:54

A nice, easy-to-sing tune about describing animals.

(Members can log in to download the full song)

Lyrics:

Chorus:
Let’s look at the animals,
Look, Look, Look!  What’s that?

Verse 1:
It’s a bear and it’s big.
It’s a big bear!

Chorus:
Let’s look at the animals,
Look, Look, Look!  What’s that?

Verse 2:
It’s a mouse and it’s small.
It’s a small mouse!

Chorus:
Let’s look at the animals,
Look, Look, Look!  What’s that?

Verse 3:
It’s a snake and it’s long.
It’s a long snake!

Chorus:
Let’s look at the animals,
Look, Look, Look!  What’s that?

Verse 4:
It’s a hippo and it’s fat,
It’s a fat hippo!

Chorus:
Let’s look at the animals,
Look, Look, Look!  What’s that?

Verse 5:
It’s a horse and it’s fast,
It’s a fast horse!

Chorus:
Let’s look at the animals,
Look, Look, Look!  What’s that?

Verse 6:
It’s a lion and it’s strong,
It’s a strong lion!


Gestures and activities to use with the “Let’s Look at the Animals (Adjectives Song)” song

There are two options:

  1. Listening worksheet – use this worksheet.  As you play the song students listen and circle the animal which best fits the description in the song.
  2. Actions.  Get everyone to stand up and do the following actions as they sing along to the song:
    - “Let’s look at the animals, Look, Look, Look!”: put your palm above your eyes as if you are looking into the distance
    - “What’s that?”: point at an imaginary animal
    - bear: act big and strong and show your claws
    - mouse: act small and run around like a mouse
    - snake: move your body like a slithering snake
    - hippo: act big and fat (blow out your cheeks) and roar
    - horse: gallop around like a horse
    - lion: act big and strong and roar like a lion


Using the “Let’s Look at the Animals (Adjectives Song)” song in class

This is a catchy song which introduces some common adjectives to describe animals.

  1. Introduce the adjectives. You are going to introduce the following adjectives by drawing pictures on the board: big / small, long / short, fat / thin, strong / weak, fast / slow.  Don’t worry if you are not very artistic – even simple line drawings will do.

    First start by drawing two lines vertically down the board so you divide the board into three equal sections. Then do the following for each set of adjectives:

    • big / small: in the first section draw an apple (as shown below).  Elicit “apple” and write “an apple” under the picture.   Then, in the second section, draw a really big apple – fill up the whole section.  Teach / Elicit “big” and write “a big apple” under the picture.  Finally, draw a really small apple in the last section, teach / elicit “small” and write “a small apple”.

      Chorus each of the phrases three times.  Then erase the pictures of the big and small apples.  Invite one student up to the board and pointing in the middle section say “draw a big apple”.  Then invite another student up and say “draw a small apple” pointing at the last section.  Give each student a round of applause.

      Adjectives board

      For the rest of the adjectives, follow the same drawing on the board procedure:

    • long / short: draw a pencil (long and short).

    • fat / thin: draw a cat (fat and thin).

    • strong / weak: draw a man (strong – with big muscles, thin – a stick man with no muscles at all).
    • fast / slow: draw a car (a fast, sporty car, zooming around and an old, broken down car with smoke coming out of the exhaust).
  2. Play “Adjectives Pictionary”.  Start by playing on the board so everyone understands how to play.  Erase everything from the board except the two vertical lines from the previous activity.  Invite three students to the board and stand them in front of each blank section on the board and give them a marker / chalk each.  Say “Draw two thin snakes and one fat snake”.  When the drawings are finished select a winner for the best picture.  Play another round or two on the board with different students (use different adjectives and nouns each round).

    Next, put students into groups of three and give each student a large piece of paper to draw on.  Shout out the adjectives to draw and give everyone 1 minute to complete their drawings.  At the end of 1 minute get everybody to hold up their pictures – you are the judge and you have to select the best picture from each group of three students as the winning picture.  Then move onto the next drawings – play until all the adjectives have been practiced.  Here are some ideas for drawings:

    • thin / fat snakes
    • big / small houses
    • fast / slow snails
    • long / short carrots
    • strong / weak animals (e.g. dogs, lions, elephants, etc.)
  3. Sing “Let’s Look at the Animals (Adjectives Song)”. There are two options for this song – either listening and doing the worksheet (click here) or singing along doing the gestures. Or you can do both!  See the section above “Gestures and activities to use with the “Let’s Look at the Animals (Adjectives Song)” song”.
  4. Play “Animal Races”.  Now we will have fun running across the room using the animal vocabulary in the song.  Clear all the tables and chairs from the room.  Line everyone up at one end of the room and lie a rope across the other end of the room (the finish line).  This isn’t going to be an actual race – there will be no prizes for the first across the finish line, but prizes can be given for the best performance (stickers, stars next to names on the class poster, praise, etc.).

    Start modeling the first “race”: say “Run like a big bear” and demonstrate running like a bear (roaring and clawing the air).  Then start the race and give your prize to the best performance (at this point make it obvious that the fastest isn’t the winner – the best performance wins!).

    Now do more races:

    • run like a big bear
    • run like a small mouse
    • slither like a long snake
    • wade across the river like a fat hippo
    • gallop like a fast horse
    • chase a deer like a strong lion
  5. Do the “Adjectives – Draw the Opposites” worksheet. Sit everyone down at their desks and give out the worksheets.  Have the students draw the opposites.  As they are working, circulate and ask questions (e.g. What is this?,  Is this a slow horse?, etc.).
  6. Set Homework: For homework, give out the “Animal Adjectives – Write” worksheet.


What are you doing?

$
0
0

Download a new song from ESL KidStuff: What are you doing?

What are you Doing songWhat are you doing?

Song Theme: Using the present continuous tense to talk about activities you are doing now.
Target Vocab: What are you doing?, right now, I am~, running, cooking, eating, swimming, walking, drinking, drawing, sleeping.
Song Length: 1:57

An energetic song with lots of actions.  The songs starts off at a medium tempo and gets faster half way through.

(Members can log in to download the full song)

Lyrics:

Chorus:
What are you doing?
What are you doing?
What are you doing right now?

Verse 1:
I am running (running!)
I am cooking (cooking!)
I am eating (eating!)
I am swimming (swimming!)
Running, cooking, eating, swimming!

Chorus:
What are you doing?
What are you doing?
What are you doing right now?

Verse 2:
I am walking (walking!)
I am drinking (drinking!)
I am drawing! (drawing!)
I am sleeping! (sleeping!)
Walking, drinking, drawing, sleeping!

Chorus:
What are you doing?
What are you doing?
What are you doing right now?

Verse 3:
I am running (running!)
I am cooking (cooking!)
I am eating (eating!)
I am swimming (swimming!)
Running, cooking, eating, swimming.

Chorus:
What are you doing?
What are you doing?
What are you doing right now?

Verse 4:
I am walking (walking!)
I am drinking (drinking!)
I am drawing! (drawing!)
I am sleeping! (sleeping!)
Walking, drinking, drawing, sleeping!


Gestures and activities to use with the “What are you doing?” song

Have everyone stand up for the song. We are going to do all of the actions as we sing, so it will be help to have the song poster on the board so everyone can see what actions to do.

  • during the chorus have everyone march in time with the song (either on the spot or around the classroom, depending on how much space you have available)
  • during the verses do the actions of the song


Using the “What are you doing?” song in class

This is a great energy burner song which introduces the present continuous tense for actions taking place at the time of speaking.

  1. Introduce the actions vocab: play “Slowly reveal the flashcard”. Your students should know some of these actions from previous lessons and possibly your warm-up routine (the “Exercise Routine” activity).  This will be a good review and an introduction to some more common verbs.

    Before class prepare the following flashcards: run, cook, eat, swim, walk, drink, draw, sleep.  You can also add some more action flashcards to this list for more practice.

    Start with the “run” flashcard – place it behind the pack of the other flashcards so your students can’t see the picture.  Slowly push the flashcard up, revealing a little of the picture.  Encourage students to shout out what they think it is.  Keep slowly revealing the image until someone shouts our the correct word (or for new words you will have to tell them the answer).  Then chorus the word 3 times.  Finally, shout “Ok, everyone run or 5 seconds … 1 – 2 – 3 – 4 – 5 – Stop!” and have everyone run around as you count five seconds.

    Then do the same routine with the other flashcards.

  2. Play “Teacher Says”. This is the same as the game “Simon Says” but with the word “teacher” instead of “Simon”.  Line everyone up in front of you and say “Teacher says drink” and have everyone do the drinking action.  Go through a few more verbs with everyone doing the actions.  Then say “sleep” without the “Teacher says” part – anyone who does the action is out!  First time, you can give a warning but after that any mistakes result in the student sitting out the round.

  3. Introduce the structure – do “Marching Chant”. After playing “Teacher says”, keep everyone standing in a line facing you.  Place the flashcards on the board in the order of the song (or use the song poster).  Model marching on the spot and clapping a slow rhythm and get everybody to copy you – marching on the spot and clapping at an easy pace.  Then start the chant in time with the clapping: “What are you doing? – What are you doing? – What are you doing?, etc”.  Make it so that everyone echoes your chant:

    Teacher (chanting): What are you doing?
    Students (echoing): What are you doing?
    Teacher (chanting): What are you doing?
    Students (echoing): What are you doing?
    etc.

    Next, insert the first action into your chant and have everyone echo as they march and clap along:

    Teacher (chanting): I am running.
    Students (echoing): I am running.

    Then add more actions into the chant:

    Teacher (chanting): What are you doing?
    Students (echoing): What are you doing?
    Teacher (chanting): I am running.
    Students (echoing): I am running.
    Teacher (chanting): What are you doing?
    Students (echoing): What are you doing?
    Teacher (chanting): I am cooking.
    Students (echoing): I am cooking.
    etc.

    You can have some fun by going fast and slow, adjusting the pace of the marching and the chant.

  4. Play “What are you doing?” actions.  Start by modelling the activity.  Get a volunteer to help you.  Start running on the spot and have your volunteer say “What are you doing?” and reply “I am running!”.  Then start doing a cooking action and have the student ask again “What are you doing?”.  Reply “I am cooking!”.  Continue this for all of the verbs, in the order of the song, using the flashcards on the board (or the song poster) as prompts.

    Next, pair up your students.  Have one doing all of the actions and the other asking “What are you doing?”.  Once finished, students swap roles.

  5. Sing the “What are you doing?” song. By now, you will be ready for the song.  Play it through one time and have everyone do the actions and encourage them to sing along (see “Gestures and activities to use with the “What are you doing?” song” above).  Use the flashcards on the board or the song poster for prompts.

    Then play the song once more for fun.

  6. Do the “What are you Doing 1?” worksheet. Give out the worksheets and circulate as your students match the sentences to the pictures.
  7. Teach “I am, He is, She is, They are”. Start by teaching the following structures on the board:
    • I am running (draw a stick man / woman running and write your name under the picture)
    • He is running (draw a stick man running)
    • She is running (draw a stick woman running)
    • They are running (draw some stick people running)

    Chorus the sentences.  Then ask students to come up to the board and draw stick men doing other actions (e.g. “She is drawing”, “They are sleeping”, “He is swimming”, etc.).

  8. Do “Magazine cut and paste activity”.  Before class you will need to prepare some old magazines, catalogues or newspapers.  Anything with pictures of people doing things which you can cut out.  The more you can get the better.  You’ll also need some large sheets of construction paper.

    Start by modelling: hold up a magazine and flick though some pages asking questions about what the people are doing E.g. “What is he doing?” and elicit “He is walking”, etc.  Feel free to choose pictures with other verbs your students might know (e.g. “She is talking”).  For each picture you choose, cut it out and stick onto a large piece of construction paper with the following written in marker pen in the middle: “What is he doing?  What is she doing?  What are they doing?”.

    After demonstrating with a few pictures, split your class up into groups – the same number of groups as the number of magazines that you have (3-4 students per group is ideal).  Give each group a large sheet of construction paper with the same text written in the middle (“What is he doing?  What is she doing?  What are they doing?”).  Have the groups go through the magazines to cut out and paste pictures of people doing things onto their construction paper.  As they are doing so encourage everybody to use the key structures.

    When everyone has finished get one or two students from each group to join a new group.  They will then ask questions about the people in the pictures (e.g. “What is she doing?”) and the other members need to reply (e.g. “She is riding a bike”.).

    Finally, end this activity by asking questions to each group about their pictures.

  9. Set Homework: For homework, give out the “What are you doing? 2” worksheet.


New Song: Who is Happy? (Pronouns song)

$
0
0

Download a new song from ESL KidStuff: Who is Happy? (Pronouns song)

Who's Happy SongWho is Happy? (Pronouns song)

Song Theme: Using subject pronouns (I, you, he, she, we, they, who) with “to be” to describe.
Target Vocab: I am, you are, he is, she is, we are, they are, who is, today, happy, hungry, quiet, noisy.
Song Length: 2:30

A fun subject pronouns song to practice saying how different people are feeling or acting.

(Members can log in to download the full song)

Lyrics:

Verse 1:
Who is happy? Who is happy?
Who is happy today?

I am happy, I am happy,
You are happy, You are happy,
He is happy, He is happy,
She is happy, She is happy,
We are happy, We are happy,
They are happy, They are happy.

Verse 2:
Who is hungry? Who is hungry?
Who is hungry today?

I am hungry, I am hungry,
You are hungry, You are hungry,
He is hungry, He is hungry,
She is hungry, She is hungry,
We are hungry, We are hungry,
They are hungry, They are hungry.

Verse 3:
Who is quiet? Who is quiet?
Who is quiet today?

I am quiet, I am quiet,
You are quiet, You are quiet,
He is quiet, He is quiet,
She is quiet, She is quiet,
We are quiet, We are quiet,
They are quiet, They are quiet.

Verse 4:
Who is noisy? Who is noisy?
Who is noisy today?

I am noisy, I am noisy,
You are noisy, You are noisy,
He is noisy, He is noisy,
She is noisy, She is noisy,
We are noisy, We are noisy,
They are noisy, They are noisy.


Gestures and activities to use with “Who is Happy? (Pronouns song)”

The main learning point for this song is learning the subject pronouns, so the gestures will focus on these words:

- during the question part of each song, do gestures for the adjectives:
  • “Who is happy?” – do a big smile and exaggerate this by placing your hands in a smile shape to extend your own mouth (thumbs touching the corners of your mouth)
  • “Who is hungry?” – look hungry and rub your tummy
  • “Who is quite?” – sing quietly and put your finger to your mouth in the “hush” gesture
  • “Who is noisy?” – sing loudly and put arms out as if trying to be really noisy

- during the pronouns part of the song have everyone point for each line:

  • “I am …” – point to yourself
  • “You are …” – point to your partner
  • “*He is …” – point to a boy in the class
  • “*She is …” – point to a girl in the class
  • “We are …” – put your arms out with hands bending inwards in the “group hug” gesture
  • “They are …” – point around the classroom to different students with both hands

*In classes with only boys/girls use a photo on the wall to point at.


Using “Who is Happy? (Pronouns song)” in class

This is great, repetitive song which really helps to learn the structure of subject pronouns plus “to be”.

  1. Introduce the vocab: subject pronouns.  Before class prepare 6 large prices of card with one subject pronoun written on each piece (I, you, he, she, we, they).  Get everyone standing up and show the first card “I”.  Shout “I” and point to yourself and get everyone to do the same (pointing to themselves). Do a few times and then put the card on the board.  Next show the “you” card and point to someone and say “you”, again have everyone follow along.  For “he” and “she”, point at a girl and boy – check that everyone understands the difference.  Then for “we” grab a couple of students in a group hug and shout “we” and have everyone get into groups as they do this.  Finally, for “they” point at other students whist shouting “they” and get everyone to do the same.

    Now you will have all of the subject pronouns on the board.  You are going to touch each card and get everyone to point and say the word – start slowly (“I” and point to yourself) and go through the pronouns going faster and faster.  This is great fun and very confusing when it really speeds up.

  2. Play “Wall Touch”.  Next, stick the pronoun cards (that are on the board) around the walls of the classroom.  Try and space them evenly around the room.  Have everyone stand in the middle of the classroom.  Shout out a pronoun (e.g. “we”) and everyone must rush to the correct word on the wall and touch it.  Do this for all of the pronouns.

  3. Do the “Subject Pronoun Chant”. Put the pronoun cards on the board in the correct order (I, you, he, she, we, they).  Have everyone sit down and start clapping a rhythm along with you – clap hands together then slap legs, clap hands, slap legs, clap hands, slap legs, etc. (start off quite slow, all in time together) .Once everyone is on time start the chant:

    Teacher (chanting): I
    Students (echoing): I
    Teacher (chanting): you
    Students (echoing): you
    Teacher (chanting): he
    etc.

    With the word on each hand clap (no chant on the leg slap yet).

    Keep going and after a a while add the verb to the leg slap:

    Teacher (chanting): I – am
    Students (echoing): I – am
    Teacher (chanting): you – are
    Students (echoing): you – are
    Teacher (chanting): he – is
    etc.

    You can have some fun by going fast and slow, adjusting the pace.

  4. Introduce the vocab: adjectives.  Before class print off some adjective flashcards, including the following: happy, sad, hungry, quiet, noisy, sleepy.  Show the first flashcard (e.g. “happy”) and get everyone to do the action for the card (e.g. a big smile and exaggerate this by placing your hands in a smile shape to extend your own mouth (thumbs touching the corners of your mouth).  Then chorus the word 3 times.  Go through each of the flashcards doing the actions and chorusing the words.
  5. Play “Guess which adjective”. Have one student come to the front of the class and show him/her one of the adjective flashcards.  He/She must do the action for that card – the first student to put his/her hand up and say the word correctly can act out the next flashcard adjective.  Keep going until everyone has had a chance to act out the adjective.
  6. Sing the “Who is Happy?” song. Put the subject pronoun cards on the board in the correct order as well as the adjective flashcards.  Alternatively, use the “Who is Happy” song poster.  Get everyone to stand up and follow you doing the actions and singing (as described above in Gestures and activities to use with “Who is Happy? (Pronouns song)”).  Play the song through 2 or 3 times.
  7. Play the “I like strawberries” pair-work activity. In this game students are going to practice using subject pronouns to talk about food likes.  Clean your board and write “Food” at the top.  Draw a picture of a strawberry and say “I like strawberries – yummy!” (and rub your tummy).  Get students, one-by-one to come to the board and draw a food they really like – each time make sure everyone knows who likes what.  It is fine if some students draw the same thing – in fact this will help to practice the words “we” and “they”.

    Once all of the food pictures are on the board, model the activity with one student.  Stand together in front of the board and choose a food picture.  Point at the person who drew it and say (for example) “He likes hot dogs” and point to the person who draw the picture.  Do the same for some more food pictures – say “she” for a girl’s picture, “I” for your picture, “you” for your partners picture, “we” for any people who have drawn the same picture as you and “they” for others who have drawn the same picture.  Each time take turns to say a sentence.

    Now put the class into pairs and have them say sentences together about different people in the classroom, all the time pointing and using a pronoun.  After about 5 minutes end the activity and then ask some pairs to stand up and show everyone some of the sentences they said.

  8. Do “Subject Pronouns 2″ worksheet.  Sit everyone down at their desks and give out the worksheets.  Have the students complete the sentences.  As they are working, circulate and ask questions (e.g. What food does she like?).
  9. Play “Spin the bottle”.  We’ll end with a fun game which practices the pronouns and “to be”.  Before class, prepare a bunch of flashcards – some adjectives (e.g. angry, fast, hungry, etc.) some animals (e.g. elephant, lion, rabbit) and some transport (e.g. car, airplane, train) – shuffle them well. You’ll also need a plastic bottle.  Get everyone to sit on the floor in a circle with the bottle and the stack of flashcards (face-down) in the middle (large classes can be split into a few circles).  Teacher starts by spinning the bottle – when the bottle stops spinning the teacher has to pick up a flashcard and make a sentence using a pronoun depending on who the bottle is pointing at.  For example, if the bottle is pointing at a girl and the flashcard is “hungry” say “She is hungry” and point at the girl.  The girl then has to do the action (act hungry and rub her tummy). Other examples are:
    • bottle pointing at a boy / elephant flashcard – “He is an elephant” (the boy acts as an elephant)
    • bottle pointing at a girl / train flashcard – “She is a train” (the girl pretends to be a train)
    • bottle pointing the person who span it / cat flashcard – “I am a cat” (the spinner acts as a cat)
    • bottle pointing between 2 people / sleepy flashcard – “They are sleepy” (the two students yawn and fall asleep)
    • bottle pointing between the spinner and another student / airplane flashcard – “We are airplanes!” (both students fly around the room like airplanes)

    Then, the person who had to do the action can spin the bottle.  This game is great fun – you can play it for quite a while as it creates a lot of laughter but also is a great way to practice the target structures.

  10. Set Homework: For homework, give out the “Subject Pronouns 1” worksheet.


New Song: What’s in your Bag? (stationery song)

$
0
0

Download a new song from ESL KidStuff: What’s in your Bag? (stationery song)

What's in your Bag? songWhat’s in your Bag? (stationery song)

Song Theme: Talking about classroom stationery and requesting things
Target Vocab: bag, pencil, pen, book, glue, crayons, ruler, eraser (GB: rubber), scissors, pencil case, stapler, pencil sharpener, tape
Song Length: 1:28

A song about stationery that you use at school, with a really fun activity.

(Members can log in to download the full song)

Lyrics:

Chorus:
What’s in your bag?
What’s in your bag?
What is in your bag?

Verse 1:
Do you have a pencil?
Do you have a pen?
Do you have a book?
Do you have glue?

Chorus

Verse 2:
Do you have crayons?
Do you have a ruler?
Do you have *an eraser?
Do you have scissors?

Chorus

Verse 3:
Do you have a pencil case?
Do you have a stapler?
Do you have a pencil sharpener?
Do you have tape?

Chorus

*a rubber in the GB version of the song


Gestures and activities to use with the “What’s in your Bag?” song

There is a great activity to go with this song.

  • before class, prepare enough bags of stationery (with all the objects in the song) so that each student has a bag.  It may be easier if you tell your students (or their parents) what to bring in the preceding class – though have plenty of spares for students who forget.  For the bags, simple supermarket bags are fine.
  • play the song and have students listen and take out each item of stationery as it is sung and place the items on their desk in the correct order (you can check by using the song poster).  This can be quite challenging, but good fun!  You may want to play the song two or three times to give everyone a chance of getting the correct order.


Using the “What’s in your Bag?” song in class

This is a great song for learning different classroom stationery.

Preparation: before class, prepare enough bags of stationery (with all the objects in the song: pencil, pen, book, glue, crayons, ruler, eraser (GB: rubber), scissors, pencil case, stapler, pencil sharpener, tape) so that each student has a bag.  It may be easier if you tell your students (or their parents) what to bring in the preceding class – though have plenty of spares for students who forget.  For the bags, simple supermarket bags are fine.

NOTE: if you don’t have enough stationery items for everyone you can use flashcards in a bag instead

  1. Introduce the vocab: Have everyone sit so they can see the table you are going to use.  Before class, put the following stationery items in a bag: pencil, pen, book, glue, crayon, ruler, eraser (GB: rubber), scissors, pencil case, stapler, pencil sharpener, tape.  First, hold up the bag and teach / elicit and chorus the word “bag”.  Then take out the first item from the bag (e.g. a pencil) and elicit / teach and chorus the word.  Place that object on the table.  Do the same for all the objects, each time placing them in a line on the table.

    When all the items are on the table, point to each in turn and elicit the item.

  2. Play “What’s Missing?”.  Tell everyone to close and cover their eyes.  Take away an item from the table and hide it behind your back.  Then say “Open your eyes”.  Point to the missing space on the table and encourage everyone to shout out the missing item.  Keep playing until you have practiced every word.

  3. Play “Bring me the item”. Pick up all of the items from the table and place them around the room.  Then select a student and say “Bring me the (scissors)” – that student will have to stand up, locate the object and bring it to you (dropping into your bag).  Do this for all the objects, each time selecting a different student.  For a challenge, you can have everyone close and cover their eyes as you put the objects around the room.

    Next, put students in pairs.  Each pair should have one bag of the stationery objects between them.  One of the students should place different items around the room and then ask his/her partner to collect each item and place into his/her bag using the structures:

    • “Bring me the (tape), please.”
    • “Put it into my bag.”
    • “Thank you.”

    When the bag is full, the students can change roles.

  4. Sing the “What’s in your Bag?” song. By now your students will be ready for the song.  Make sure everyone has a bag full of the items from the song.  Explain that they have to listen carefully and take out each item in the order of the items in the song – and place them in a line, in the correct order, on their desk.  Play the song and then check the order of everyone’s items after the song has finished (you can use the song poster for this).  You may want to do this activity 2 or even three times until everyone can get the order right.
  5. Play “Object Swap”.  By the end of the song activity, everyone will have their stationery objects in front of them, on their desks.  We are going to mix them all up amongst the students and then everyone will have to find their objects again!

    Start by saying to one student, “Collect the (pencils) and give everybody a different pencil.”.  Do the same for all of the objects (using different student to distribute them), so by the end everyone has a bag full of stationery which isn’t theirs.

    Everybody now has to find their own stationery.  Get everyone to stand up and mingle, using the structure:

    • “Do you have my (pencil)?”

    As everyone mingles they have to swap their objects (each student cannot have two or more of any one item) and continue until their bag is full of their own items.

  6. Do the “Classroom Stationery Match-up” worksheet. Give out the worksheets and have everyone color, read and write the words for each object.  Circulate as everyone is working away, and ask lots of questions (e.g. What’s this?, What color is this?, Do you have a (pen)?, etc.).
  7. Set Homework: For homework, give out the “Stationery Matchup 3” worksheet.


Viewing all 62 articles
Browse latest View live